Composting is a great way to turn your kitchen scraps and yard waste into nutrient-rich fertilizer for your garden. Our guide to composting for beginners is here to help you get started!
There is a good reason gardeners call compost “black gold”—it’s packed full of nutrients, great for conditioning your soil, and, best of all, extremely cheap (and possibly even free) to make!
If you’re new to composting, the idea of rotting your food scraps in your backyard might sound intimidating, but no worries! We’ve got you covered with our composting for beginners guide. You’ll be ready to start your very own compost piles by the end of this article. Let’s get composting!
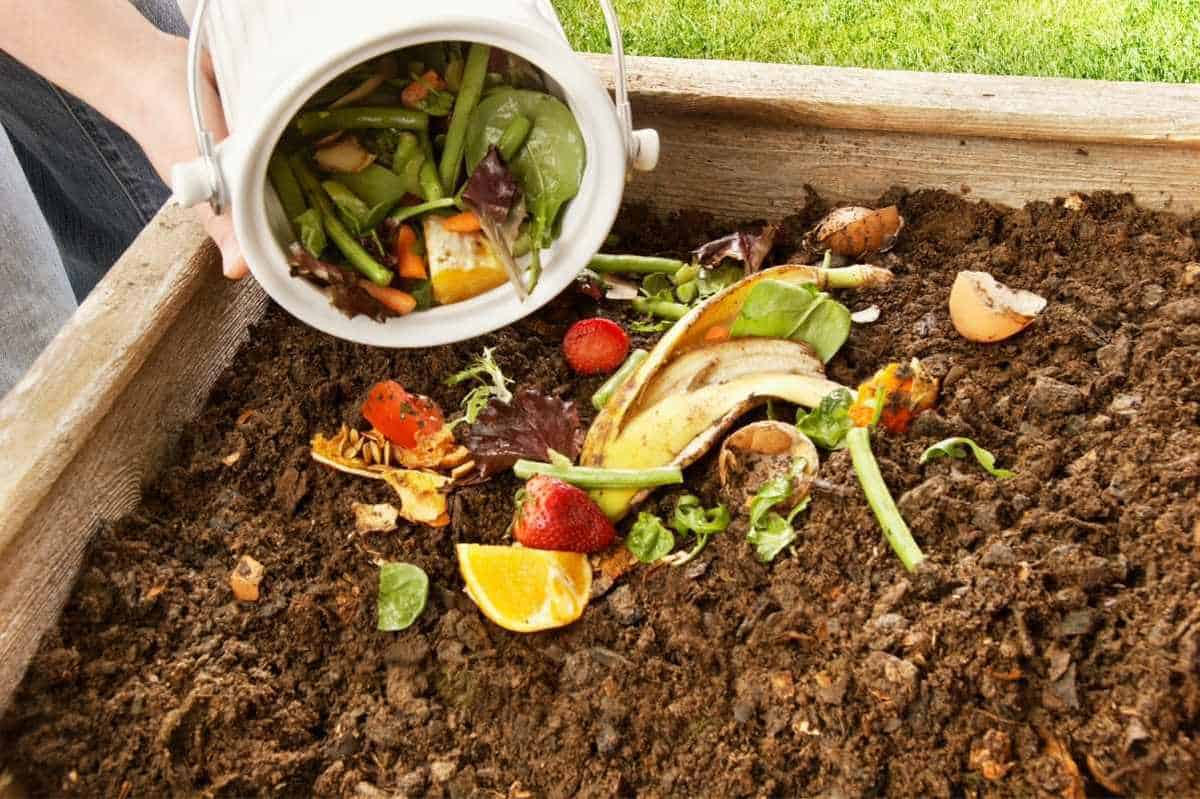
Table of Contents
Why should you compost?
Compost is the best all-around soil amendment you’ll find. Compost:
- Adds nutrients to the soil
- Improves soil drainage
- Minimizes soil erosion
- Encourages good bacteria and fungi in the soil
- Lowers your carbon footprint
- Keeps food scraps and yard waste out of landfills
Plus, it is free to make (unless you buy a special bin or tumbler) and easy to do. Let’s make compost!
Why is composting good for the environment?
Composting keeps lots of organic matter, like food and yard scraps, out of the landfill. In a landfill, this waste generates greenhouse gases (methane gas, in particular). If you compost these materials instead, those methane emissions are significantly reduced, and you end up with an excellent soil amendment for your garden. It’s a win for everybody.
Compost also helps conserve water and control stormwater overflow. Seriously, there are SO many good reasons to compost!
What’s the difference between cold composting and hot composting?
There are a lot of different kinds of composting, but we’re going to talk here about the two basic types of composting done by most home gardeners—cold composting and hot composting. The main difference here is—you guessed it!—the temperature.
- Cold composting: A cold compost pile is made when you just toss whatever kitchen scraps, yard waste, and other organic materials into a bin and let nature take its course—and it will take its course! The significant benefit of a cold compost pile is that it’s completely no-fuss—you honestly don’t even have to turn it or water it if you don’t want to (as long as the pile is exposed to the rain). The negatives are that the decomposition can be incredibly slow—we’re talking two years or more to get fully-formed compost. And along the way, you might have a super smelly pile that attracts all kinds of bugs.
- Hot composting: A hot compost pile happens when you get the correct ratio of carbon-containing materials (browns) and nitrogen-containing materials (greens) in a pile with water and air. The pile heats up and decomposes rapidly, often getting you compost in as little as two months. When done properly, there is no smell and no bugs. The negative here is a hot compost pile requires a bit more maintenance and care—you have to make sure you have the correct ratio, you are regularly turning the pile, and the pile is properly hydrated.
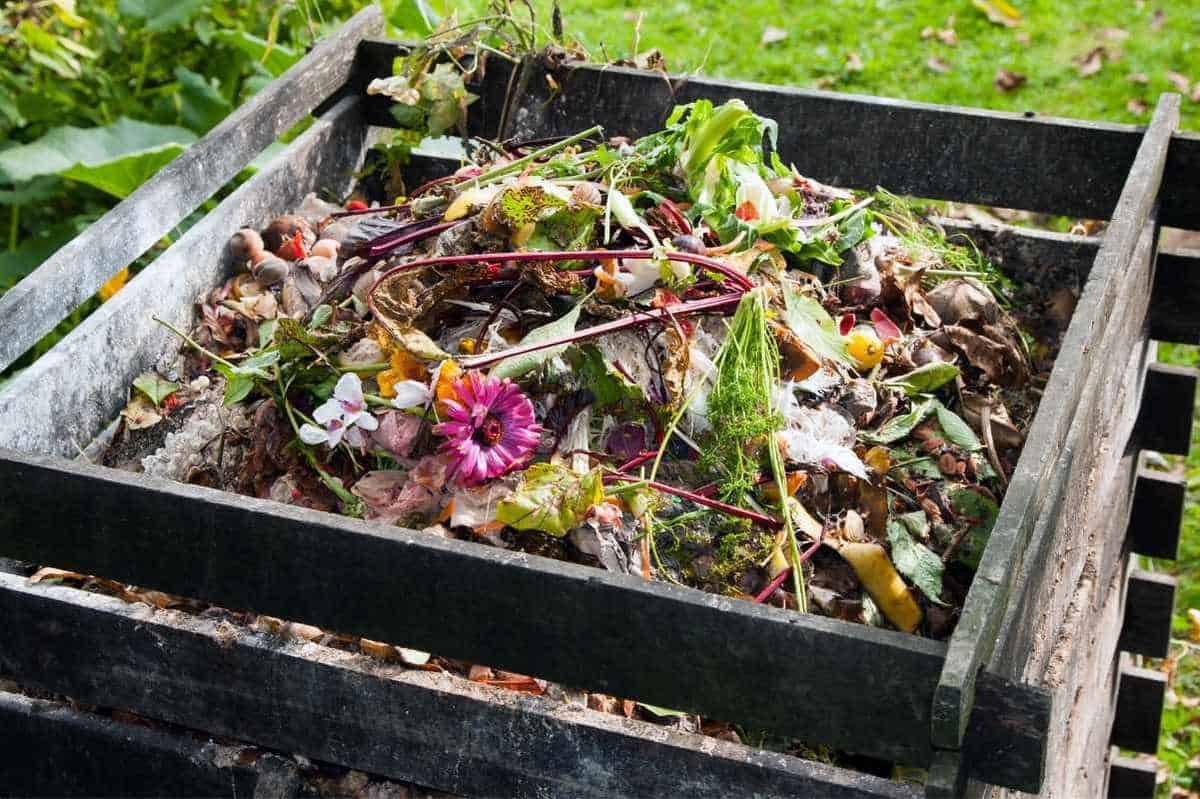
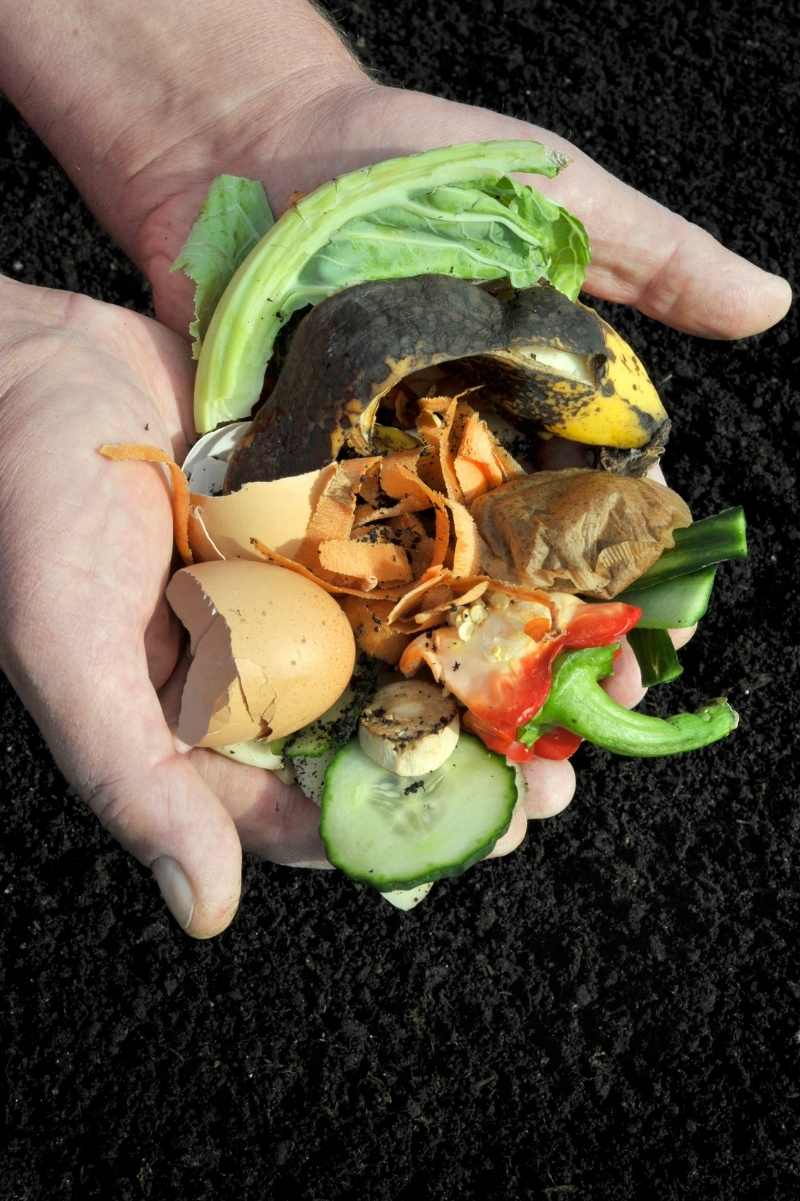
What can you compost?
Lots of things can go in your backyard compost pile instead of the garbage:
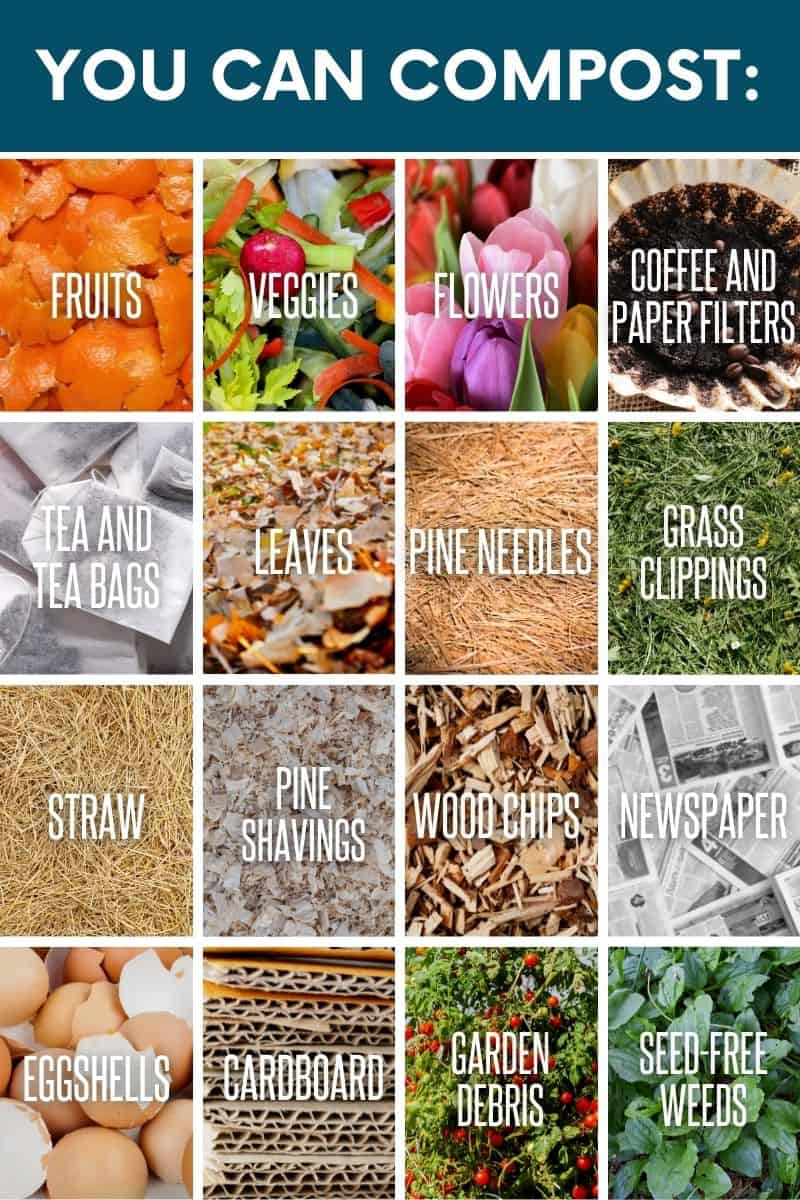
- Fruits
- Vegetables
- Flowers
- Coffee grounds and paper coffee filters
- Tea leaves and most tea bags
- Leaves (chopped or mulched)
- Pine needles
- Grass clippings and other yard waste
- Straw
- Pine shavings
- Wood chips or mulch
- Torn-up newspaper (not glossy)
- Eggshells
- Cardboard (shred or cut into 1-2″ pieces, so it breaks down faster)
- Garden debris (disease-, pest-, and seed-free)
- Seed-free weeds
What should you not compost?
While there are lots of things that you can compost, these are the organic materials you’ll definitely want to skip:
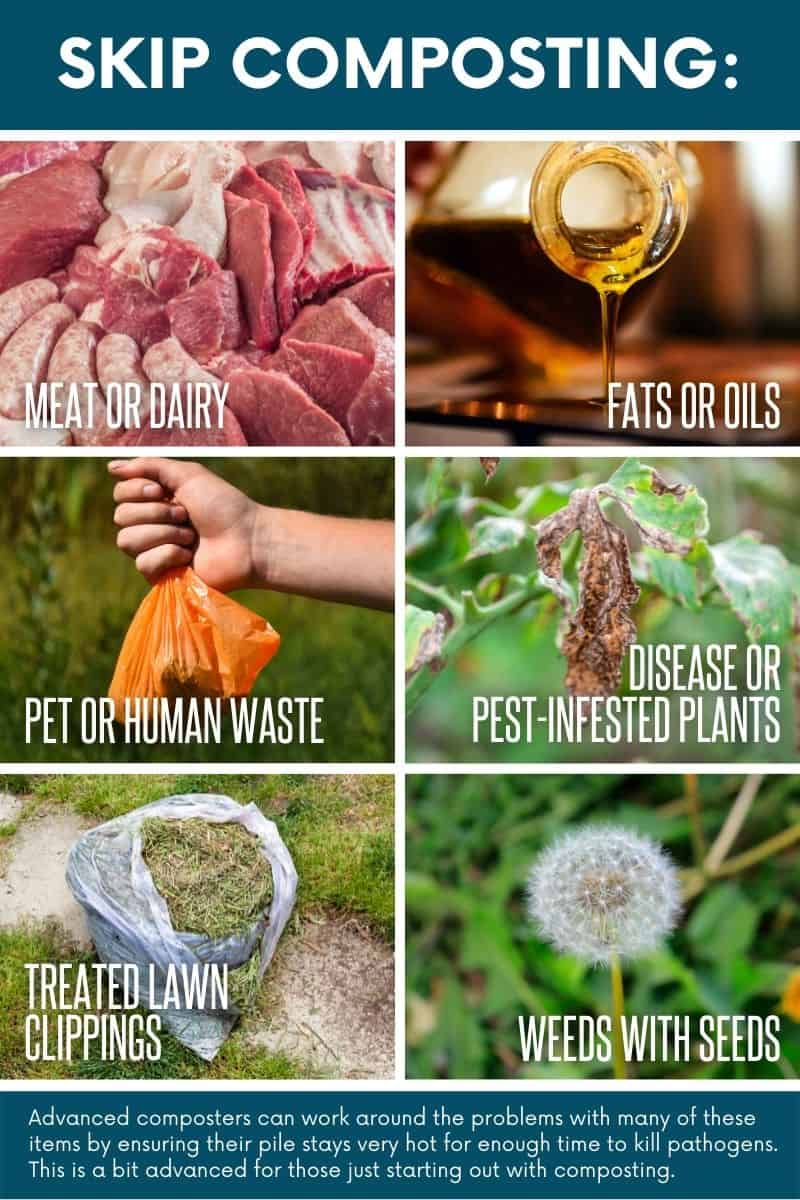
- Dairy products, bones, meat scraps, and fish scraps can make your compost smell terrible and attract pests.
- Fats or oils will cause the same problems as dairy and meat products.
- Pet or human waste can contain parasites, pathogens, and other nasties that can be harmful to people. Those pathogens can be killed if you can confirm your hot compost pile gets up to at least 145°F for a week or more—but that’s a little advanced for most beginner composters.
- Diseased or pest-infested plant material.
- Synthetic chemical-treated yard waste can add pesticide or herbicide residue to your compost pile.
- Weeds with seeds unless you can confirm your hot compost gets up at least 145°F for a week or more to kill the seeds.
Some people suggest adding dryer lint to a compost heap, but we typically advise against it unless you know that it only comes from cotton, wool, or other natural fibers. So many clothes are made with synthetic fabrics nowadays that you’ll want to skip the dryer lint in most cases.
What materials do you need for hot composting?
Every compost pile will be a little different, but in general, you’ll need four ingredients:
- Brown materials are the dry materials that add carbon to the compost, such as leaves, newspaper, and dry or dead plants.
- Green materials are the wet ingredients that add nitrogen to compost. They include fruit and vegetable scraps, yard trimmings, and eggshells.
- Water will help break down the browns and greens.
- Air will keep harmful bacteria from taking over your pile.
What are the basic steps to composting for beginners?
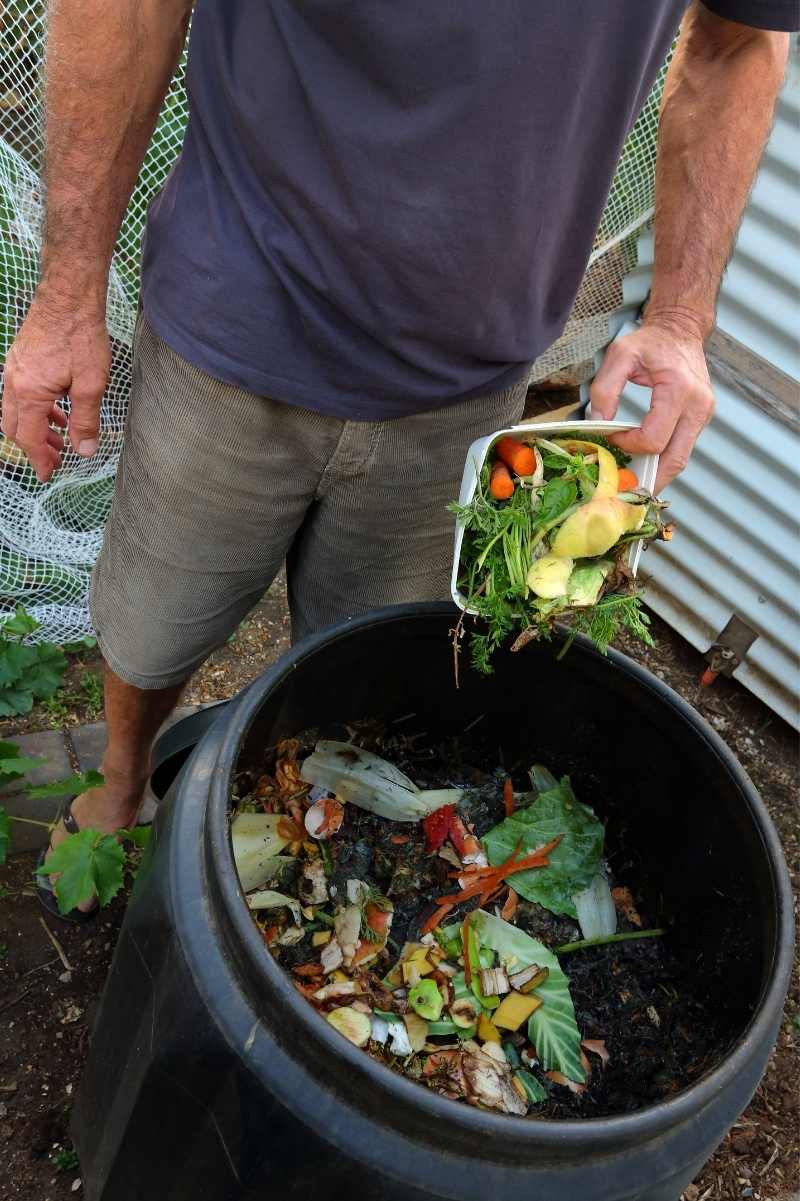
Starting a cold composting pile is as simple as picking a spot and beginning to dump your kitchen scraps. But most folks are looking to start a hot composting pile, and that’s what we’re going to tell you here. A good compost pile will have a mix of approximately equal amounts of brown and green materials and should be kept just slightly moist. This is roughly how to get started with backyard composting:
- Choose a location for your compost bin or pile. You want the compost pile to be easily accessible with easy access to water and at least partial sun. The heat from the sun will help the decomposition process happen faster, so you can get to using your compost sooner. We don’t recommend putting it right next to your house—while it generally shouldn’t smell, things happen, and the compost can get unbalanced. If that happens, it might stink for a few days until you’ve remedied the situation, and you don’t want that wafting through your windows!
- Build your bin. You don’t have to use a bin—a pile on the ground works just fine—but if you have a bin or tumbler you are using, go ahead and get it up and in place.
- Add compost or soil. If your compost pile isn’t in direct contact with the native soil (like if you are using a compost tumbler), we recommend inoculating your pile to get the good bacteria going by adding a scoop or two of rotted compost or soil.
- Add materials to the compost bin or pile in the correct ratio. Add about four parts carbon-rich brown materials to each one part nitrogen-rich green materials. They don’t need to be exactly scientific here—just make sure you are prioritizing getting more browns than greens in the mix.
- Add water. The compost pile should always be about as wet as a wrung-out sponge. The moisture will help the organic matter break down, but too much will suffocate the good microbes that are turning waste into compost.
- Aerate. If you just have a large pile or bin for your compost, you’ll want to turn the compost regularly with a pitchfork, shovel, or special compost turner. Alternatively, you can buy compost tumblers that you can spin to aerate the compost. Either way, this is a vital step, as it ensures that water and air are distributed evenly throughout the compost. Turn your pile once per week.
Growfully Protip
You’ll see a lot of discussions about hot compost ratios out there. You’ll hear everything from 40:1 to 1:1 ratios! And that’s largely because folks are confusing what they are counting. The higher ratios you see (30:1 is common) are referring to the actual atomical carbon to nitrogen ratio by weight of your material. Unless you are in a lab and want to measure the atomical nitrogen levels of every cabbage leaf you add, you’re better sticking to the general browns:greens volume ratio of between 3:1 and 4:1. So for every one bucket of green stuff, add three buckets of brown stuff. Easy!
 How do you start a simple compost bin?
 How do you start a simple compost bin?
Starting a compost pile can be as simple as piling the materials on the ground in your yard! Really. You don’t need anything fancy or expensive. That being said, if you want to contain your compost pile a little better (which may help speed up decomposition) or if you want to use something that is a bit more visually appealing, here are some good options:
- Fencing: Have some extra wire or plastic fencing around? Drive some stakes or pieces of rebar into the ground and then form the fencing around the stakes in the shape of a circle. Keep it secure with zip ties. Voila! You have made a compost bin.
- Pallets or other scrap wood: Screwing together four scrap pallets is a simple way to make a compost bin. You can also use other scrap wood you have around—old fencing, deck boards, or barn wood. Anything that can make four walls and handle the rain.
- Concrete blocks: If you have a source of concrete blocks, you can use a little elbow grease (and your kindergarten block-building skills) to stack them into the shape of a bin. Concrete blocks don’t look the most beautiful, but they are affordable and they will last almost a lifetime.
- Pre-made compost bin (wooden, plastic, or wire): You can get pre-made compost bins from almost any big box store or home store. Typically they are either made from rot-resistant wood (like cedar) or wire. In the Growfully Gardens, we have six of these cedar compost bins that we use for large compost piles.
- Pre-made compost tumbler: Maybe the most common compost option for the home garden is the compost tumbler. These cylindrical tumblers keep all the compost neat and tidy, they make it easy to aerate the compost, and they are so easy for the beginning composter. The two drawbacks here: they aren’t cheap, and they are limited on the amount of compost you can make. But if you’re just looking for the easiest way to start composting for beginners? You can’t beat a good tumbler! This is our favorite compost tumbler—it’s easy to turn, sturdy, and divided into two sides so one side can be processing while you’re adding to the other.
Growfully Protip
When you’re building your compost bin, try to think of the space you’re looking to build as either a cylinder or cube—you’ll need the vertical volume to help with decomposition. So a 4ft x 4ft x 4ft bin is better than a 4ft x 2ft x 4ft bin.
How long does it take to compost?
There are lots of factors that go into the composting time. How warm was your compost pile (you’ll see much faster decomposition in the summer than in winter)? Was it watered and turned regularly? Were you continually adding new materials?
The time it takes for compost to be ready depends on a lot of things, but in general, you can expect compost in a hot bin to be ready two to four months after you add the last of the organic matter. In a cold bin, you’ll be able to use your compost two years or so after your last addition.
In most cases, we recommend having two compost areas or a divided bin. That way, you can always have one side where the compost is processing and getting ready and another side where you can be actively adding new food and yard scraps as you have them.
Growfully Protip
Want to speed up composting? Bacteria is your friend! You can help your compost pile along by inoculating your pile with good bacteria. Do this by tossing in a handful of already rotted compost or by using a compost accelerator.
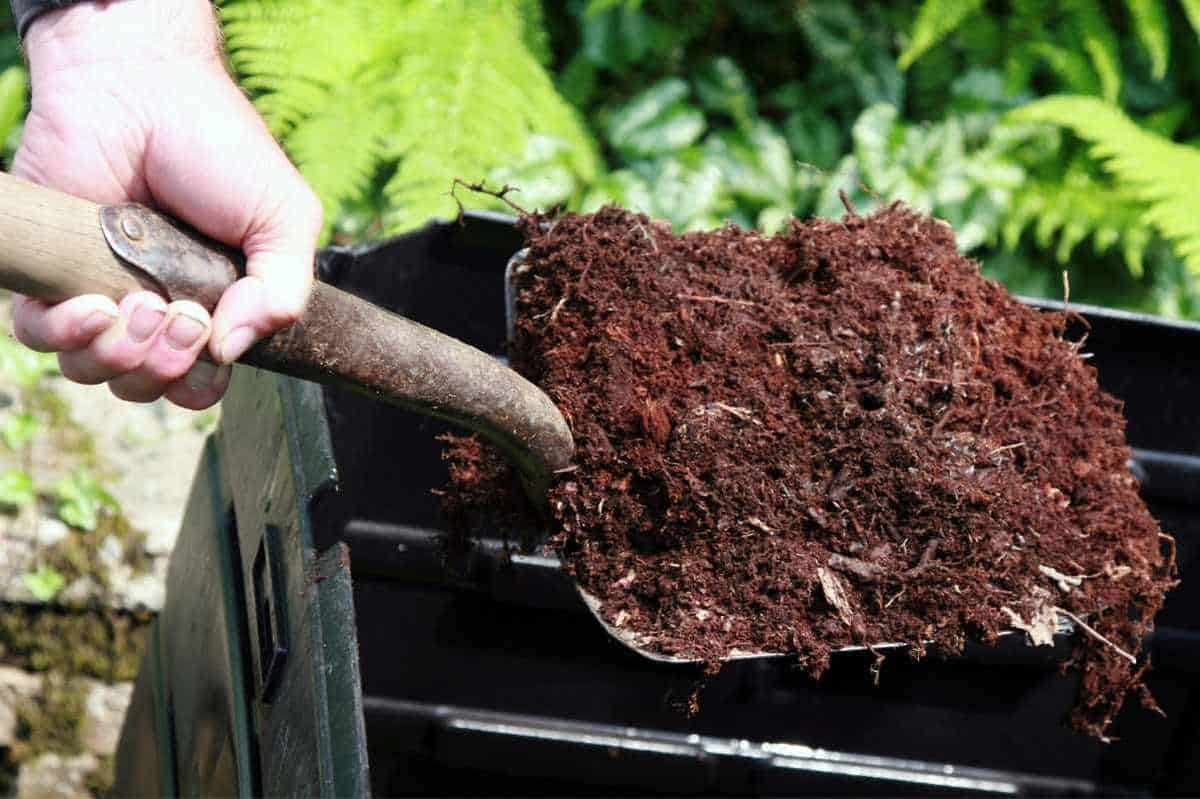
When can I start using my compost?
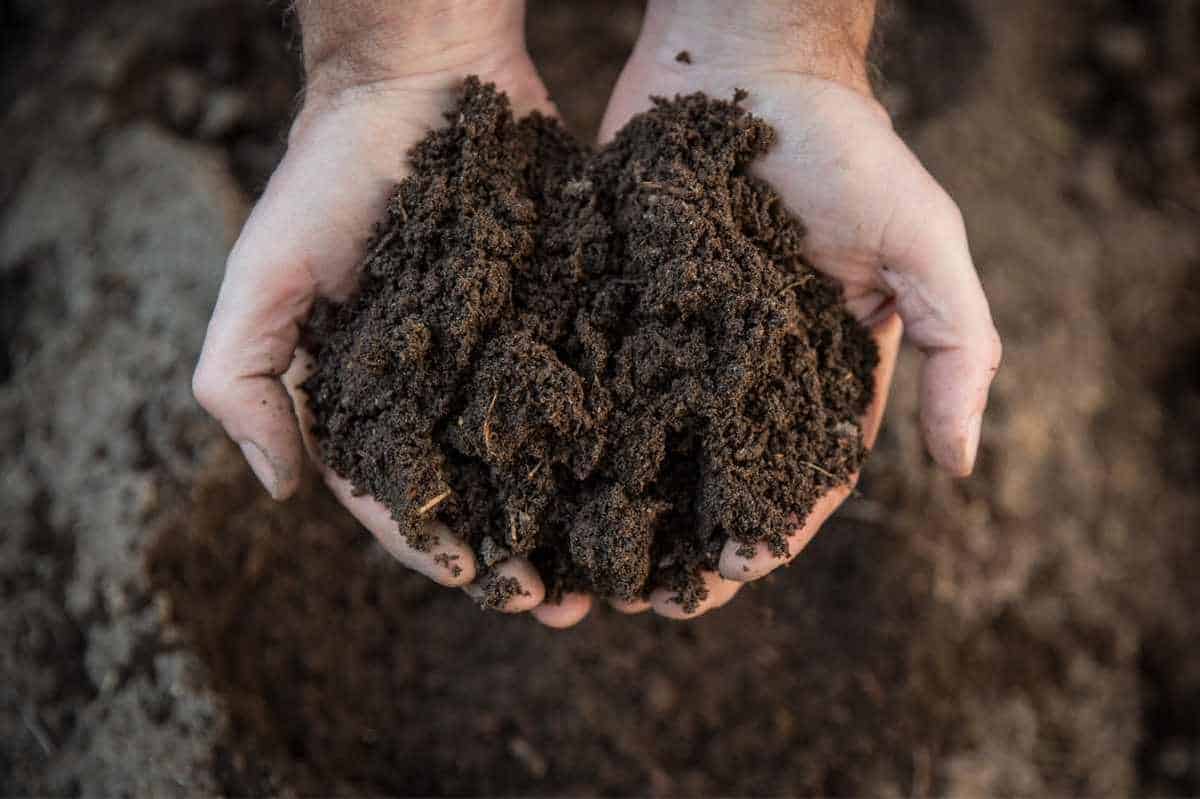
You’ll know your compost is ready when it looks, feels, and smells like rich soil. There shouldn’t be any visible pieces of whatever organic matter the compost is made of. Instead, the compost should be dark brown and crumble in your hands like soil.
How do you use compost?
The easiest way to use compost is to spread a generous layer of compost on top of last year’s soil before planting in the spring. Some gardeners choose to mix this compost layer into the top few inches of soil, but because we are no-till gardeners, we just plant directly in the compost.
When your plants need a nutrient boost, you can also use compost for side dressing. Just sprinkle the compost around the base of the plant and gently work it into the top layer of the soil with your fingers.
You can also turn compost into compost tea to feed your plants throughout the growing season. Some people spread a layer of compost on top of their soil to serve as a kind of mulch, but in our 6b growing zone, our summers are too hot and dry for this to be effective.
Can you use compost before it’s ready?
We don’t recommend it. Any food scraps that aren’t broken down yet may attract animals, and the decomposition process will take up some of the nutrients from the soil. It’s best to be patient!
That being said, if your compost looks almost finished but the only things left are some big chunks of sturdy things—like eggshells or peach pits—you can sift the compost and use the finished compost. This is especially a common problem with cold compost piles. Just return the big chunks to the pile and use the beautiful black gold you’ve sifted!
Growfully Protip
You can make an affordable compost sifter by making a frame from 2″ x 2″ wooden boards that is large enough to fit over your wheelbarrow. Then staple on 1/2″ hardware cloth over the frame. Place the sifter over top of your wheelbarrow, place a shovelful of compost on top of the sifter, and then shake!
Can compost sit too long?
Not really. The compost will continue to break down slowly thanks to microorganisms, worms, and other soil friends, but it will still be good to use for many, many years.
Troubleshooting
My Compost Pile Smells Bad or Looks Slimy!
If your compost pile has an unpleasant odor or is slimy, then it is probably too wet. Either you’ve let it get too much water, added too many green materials, or haven’t aerated the pile enough. Add some more dry brown materials and mix them in well to incorporate more air pockets into the compost.
Why Isn’t Anything Breaking Down?
If there are too many brown materials or the pile gets too dry, the organic matter will break down much more slowly. Add some greens and a bit of water, and aerate well.
If you live in an area with especially cold winters, expect the decomposition process to slow down considerably in the winter. When the weather warms in the spring, give your compost a good stir, and it should start back up again!