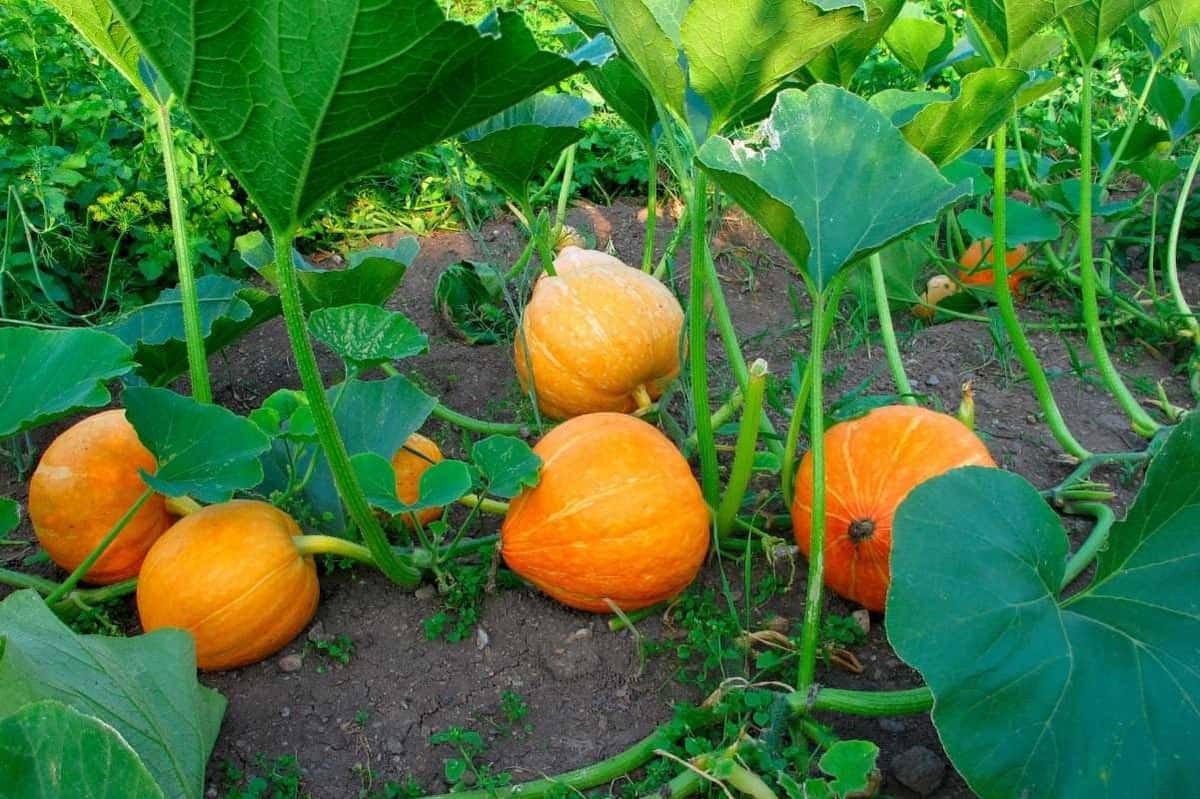
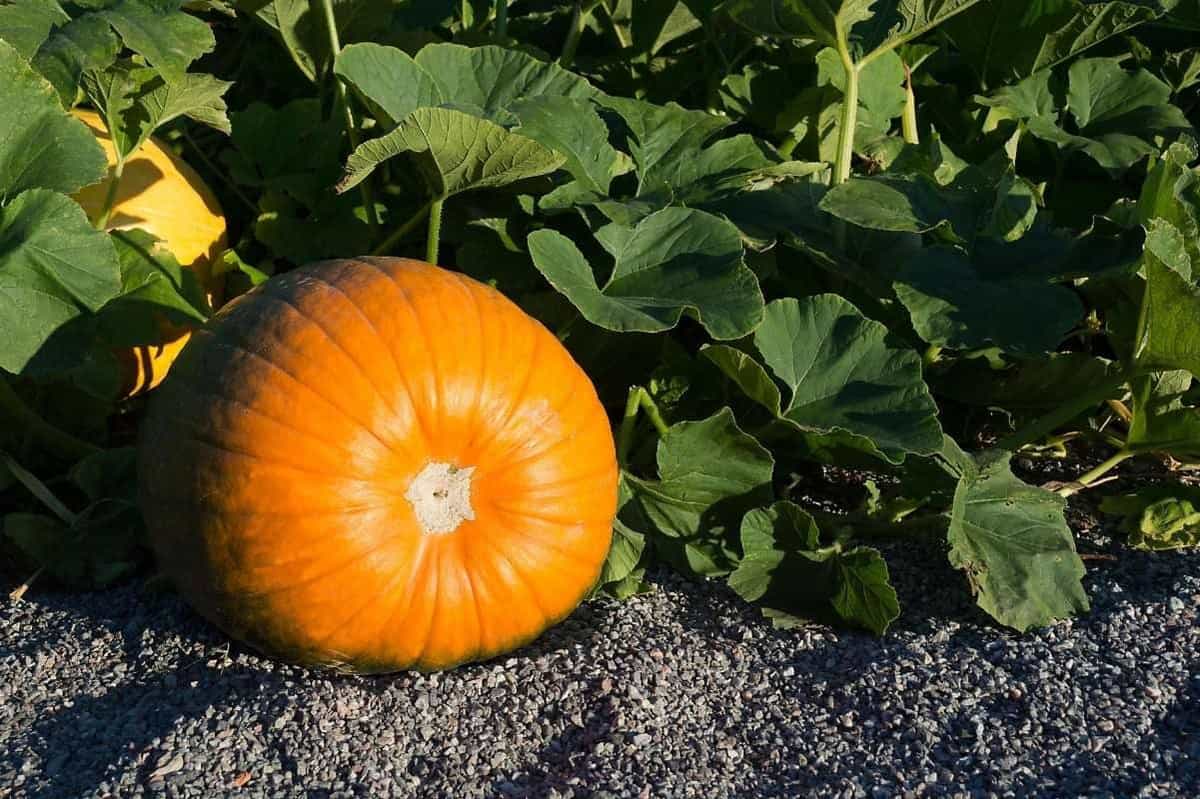
Pumpkins are one of the most rewarding crops to grow in the home vegetable garden. Not only are they delicious and nourishing, but they also serve as wonderful autumn decor—they truly are a multipurpose crop!
With our expert guidance, you’ll soon be growing your own private pumpkin patch. Let’s get growing!
Table of Contents
Varieties of pumpkins
There are over 150 different varieties of pumpkins, so there’s plenty to choose from! Which type you choose will depend on how you plan on using your pumpkins.
Sugar, pie, or sweet pumpkins are best for baking and cooking—they tend to be smaller, sweeter, and more tender. Some of our favorite pie pumpkin varieties are:
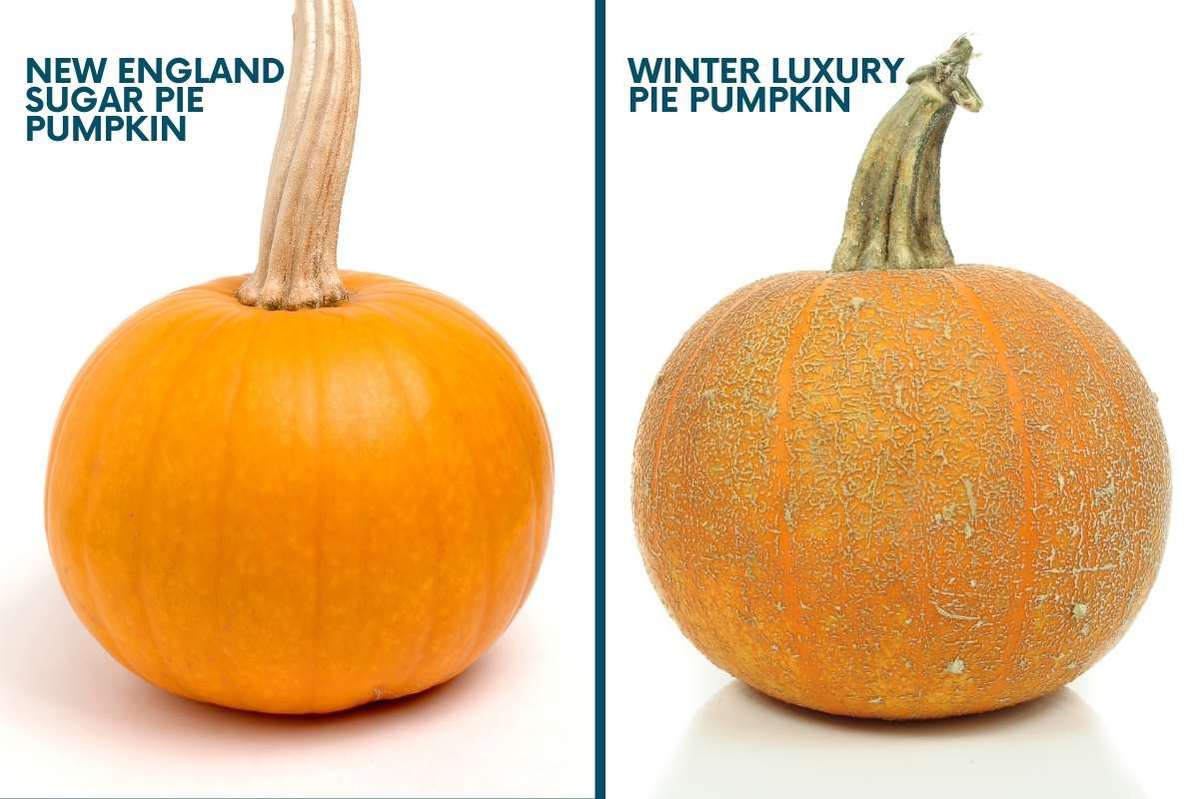
- New England Sugar Pie Pumpkin—This is a classic-shaped pie pumpkin with fine, sweet flesh that is perfect for pies. The individual pumpkins range between 4-5 pounds each, making this a good option for growing vertically.
- Winter Luxury Pumpkin—This is a well-loved pie pumpkin that produces pumpkins around 6 pounds each. The orange pumpkin is covered in a very fine white netting (similar to a cantaloupe) that makes it look almost dusty from a distance.
If you’re looking for ornamental pumpkins for fall decor, your choices are almost endless! There are dozens of varieties of pumpkins that range from wacky and wild to traditional jack-o-lantern shapes. Here are some of our favorite ornamental pumpkins:

- Musquee de Provence—This pumpkin is sold for eating in Europe, but we love the big fairytale lobes and the pale pink color for decor.
- Knuckle Head—We love a good warted pumpkin, and Knuckle Head is a classic!
- Kakai—This medium-small pumpkin is a favorite in the Growfully Gardens because of its green and orange speckled patterns.
- Howden—If you’re looking for a classic Halloween pumpkin, grow a Howden vine. These are tall, round, and have great handles.
- Blanco—This classic round white pumpkin is crisp and clean. It’s a medium-small size, perfect for painting, carving, or decor.
- Jack-Be-Little—You know those mini pumpkins that kids always flip over in autumn? Well, you can grow your own with Jack-Be-Little! This vine produces many perfect 4″ little pumpkins for decor.
Just because a pumpkin is listed as an ornamental pumpkin doesn’t mean it isn’t good to eat! Many of the ones above are also quite delicious. But some of our favorite double-duty pumpkin varieties are great for both cooking and decorating:
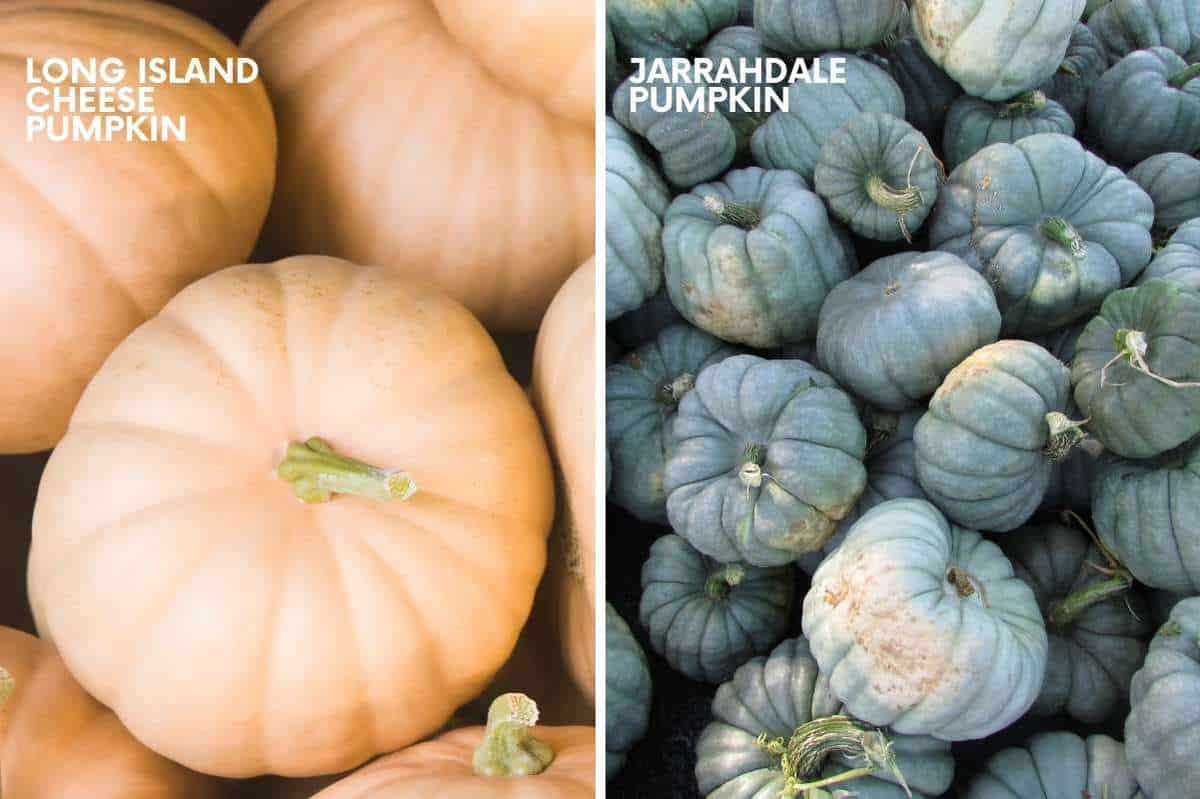
- Long Island Cheese—This classic heirloom has dusty tan skin and a medium-sweet flesh that makes it particularly good for savory applications (pumpkin bisque, anyone?). It has excellent long storage ability, too.
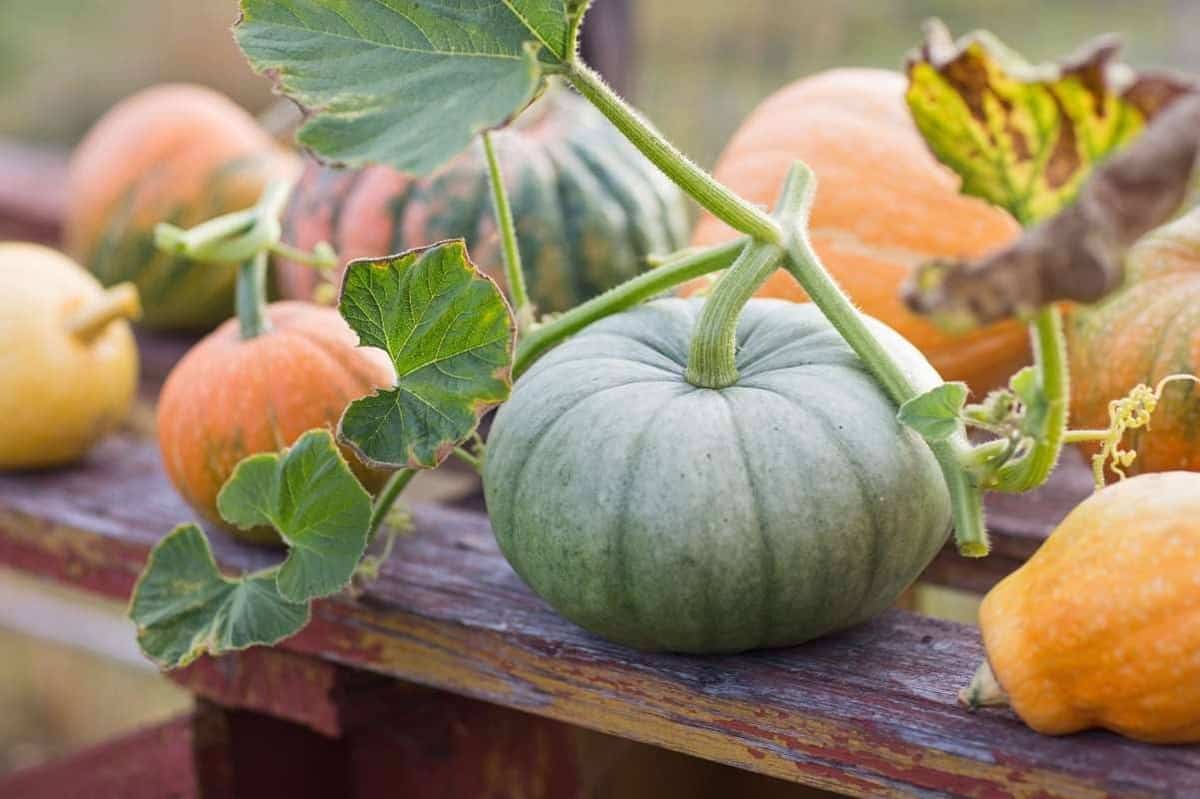
- Jarrahdale—This is a dusty green pumpkin with vibrant orange flesh that is quite eye-catching! Its flesh is great for savory cooking, and it’s a great storage pumpkin. In good conditions, it’ll easily last an entire year in storage!
Growfully Protip
Want to grow those giant pumpkins you see all over the internet? Dill’s Atlantic Giant and Big Max are two popular giant pumpkin varieties to try out.
What are the best pumpkins to plant?
Pumpkins take up a lot of space in the garden, but they also provide you with a crop that can be stored and used for months—so it’s worth it in the end! We have a lot of space in our garden, so we always grow at least one pie pumpkin and then a few strictly ornament pumpkins. If you are low on space, I’d recommend focusing on one of the double-duty varieties we recommend above—Winter Luxury and Long Island Cheese are at the top of my list.
Are pumpkins easy to grow?
Yes! Pumpkin plants are simple to maintain once you get them going. The only caveat here is that they require a long growing season, so make sure you start them early enough.
What month do I plant pumpkins?
Pumpkins are notoriously long growing, though some varieties are better for short growing seasons. But the most important thing to remember with pumpkins—as with all squash—is they like it HOT! Only plant pumpkins outdoors after all danger of cold weather has passed. Here in zone 6B, that’s mid to late May, but your timing may vary.
In mild to moderate climates where you have a long growing season, you can direct sow pumpkin and winter squash in the ground starting two weeks after your last frost date.
In cooler climates (or if you’d like to get earlier harvests in mild or moderate climates), you can start pumpkin seeds indoors 2-3 weeks before the last frost date. I know it is tempting to start them earlier, but don’t! Pumpkin plants grow large very quickly, and if they are too large, they will go through dramatic transplant shock when you plant them in their final home.
Growfully Protip
If you choose to transplant pumpkin seedlings, try to use seeding pots that do not require you to disturb the roots. Newspaper pots, soil blocks, or peat pots are all good options.
Set starts outside two weeks after your last frost date. Our calculator below can help you figure out those planting dates for your zone!
Growfully Protip
In cooler climates, your pumpkin plants will get off to a stronger start if you warm the soil before either direct sowing or planting seedlings. You can do this by stretching black plastic over the garden bed for 7-10 (hopefully sunny!) days before planting. Remove the plastic and then plant as usual. Keep the plants well protected with mulch and a row cover until warm weather has set in for good.
How long does it take to grow a pumpkin?
Pumpkins take six to ten days to germinate. After germination, they’ll grow vines, leaves, and flowers. After successful pollination of your pumpkin’s flowers, it’ll take between 45 and 75 days for the pumpkin to fully mature, depending on the variety.
Overall, you can expect it to take between 75 and 110 frost-free days to grow a pumpkin.
Growfully Protip
To encourage even growth on all sides of your pumpkin, gently rotate the fruit as it grows. Be careful not to snap it off the vine!
Where should I plant pumpkins?
Plant pumpkins in a site with full sun. The soil should be enriched with aged manure or well-rotted compost before planting, as pumpkins are heavy feeders. Make sure they have plenty of room to spread out and grow since pumpkin vines take up a lot of space in the garden.
Growfully Protip
Small pumpkin varieties (like Jack-Be-Little or New England Sugar Pie) can grow up a sturdy trellis, fence, or arch. Just make sure to offer support to the growing fruit by installing hammocks when they are about the size of a baseball. You can make hammocks out of old stockings, pieces of fabric, or mesh bags. Or you can purchase premade hammocks online.
Should I start my pumpkins indoors?
Pumpkins don’t love to be transplanted, so if you can avoid it, do. However, pumpkins require an average of 100 days to mature, so if you live in a cooler climate, you might need the head start of starting indoors. In that case, start your seeds two to three weeks before your last frost date.
A week before transplanting, start hardening off your seedlings. Set them outside in a sheltered area for increasing amounts of time every day to get them used to outdoor conditions. Hardening off helps prevent transplant shock, so your pumpkin seedlings thrive.
Growfully Protip
It is tempting to start your pumpkin plants earlier but don’t. They grow quickly, and the larger the plants, the more rise of transplant shock when you put them outdoors.
How to start pumpkin seeds indoors
To start seeds:
- Choose a seed starting vessel that will disturb the plant’s roots as little as possible. We like newspaper pots, soil blocks, or peat pots for pumpkin plants.
- Fill with sterile seed starting medium (we use four parts coco coir, two parts vermiculite, and one part perlite).
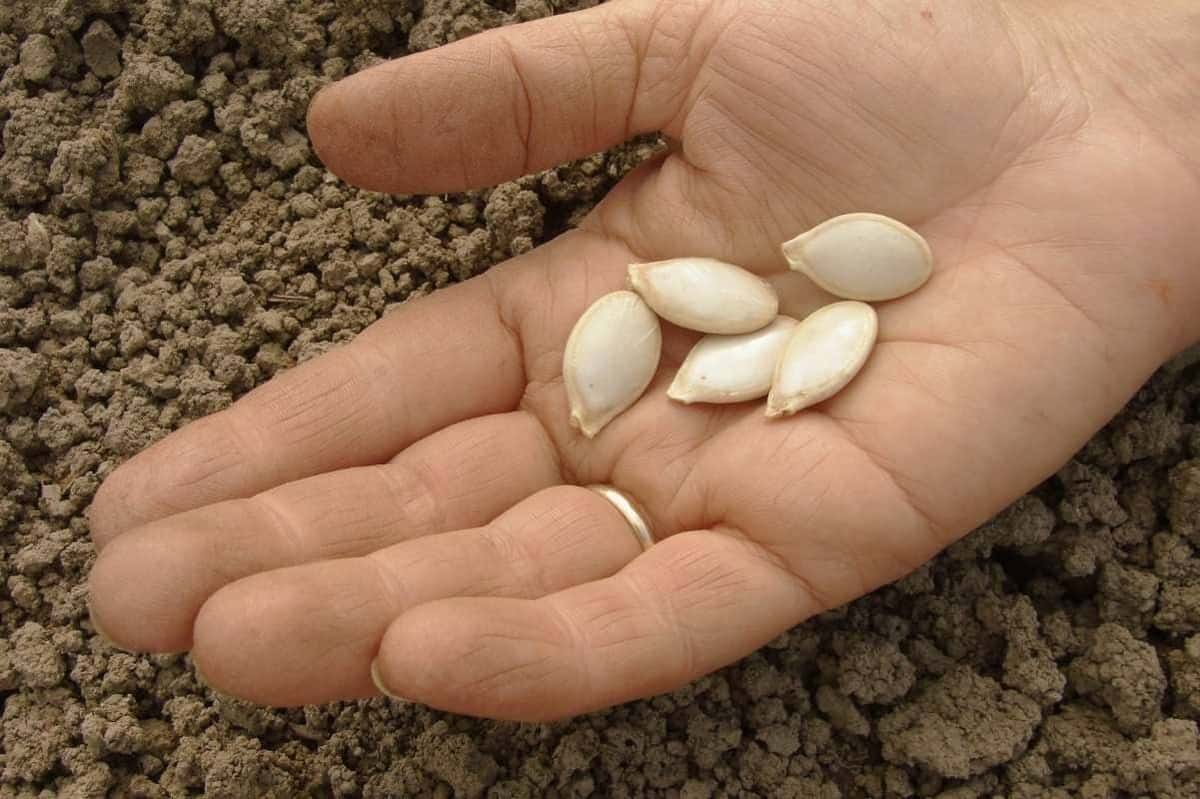
- Sow 2-3 seeds in each spot, about 1″ deep in the pot.
- Gently water the seedlings using a mister or sprayer, and keep the soil evenly moist until the seeds have germinated.
- Place the seeds in an area where the temperature stays very warm—between 80-85°F for quickest germination. You should see some seeds popping up within 5-7 days.
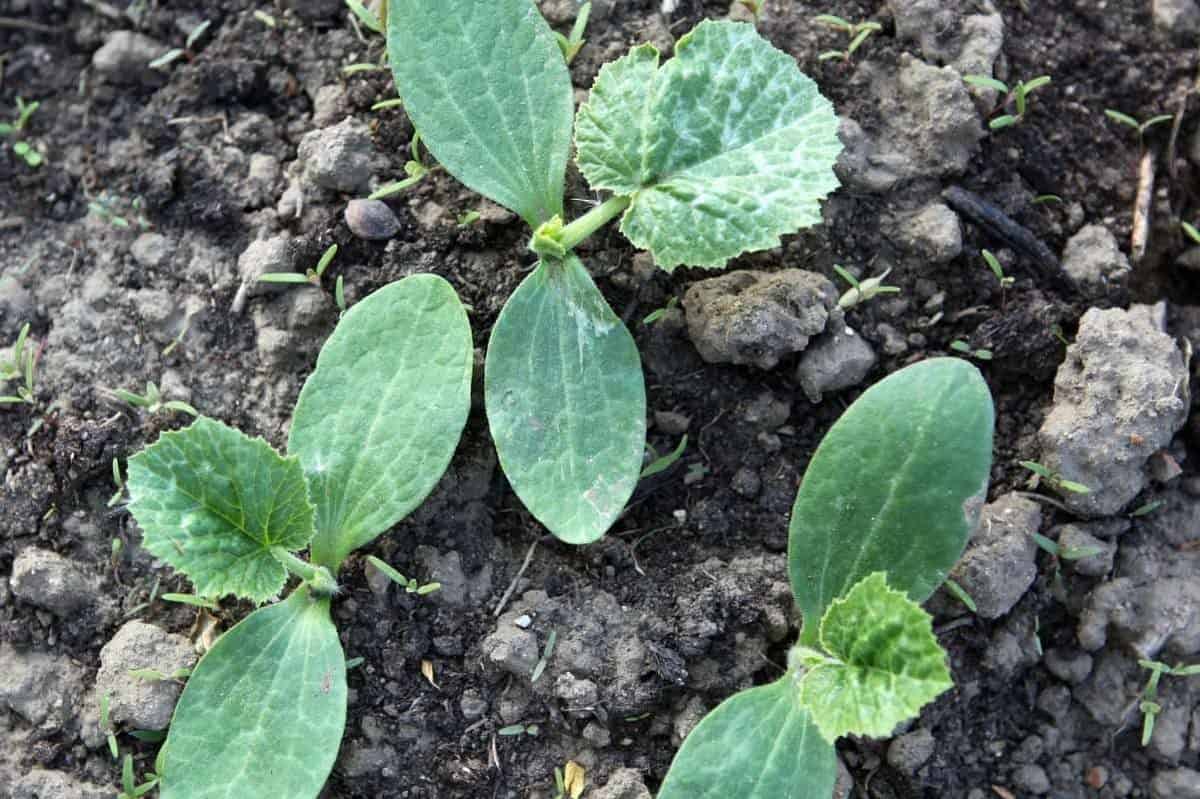
- Once seeds have shown their true leaves, clip out any extra seedings in each cell with a small pair of scissors or snips.
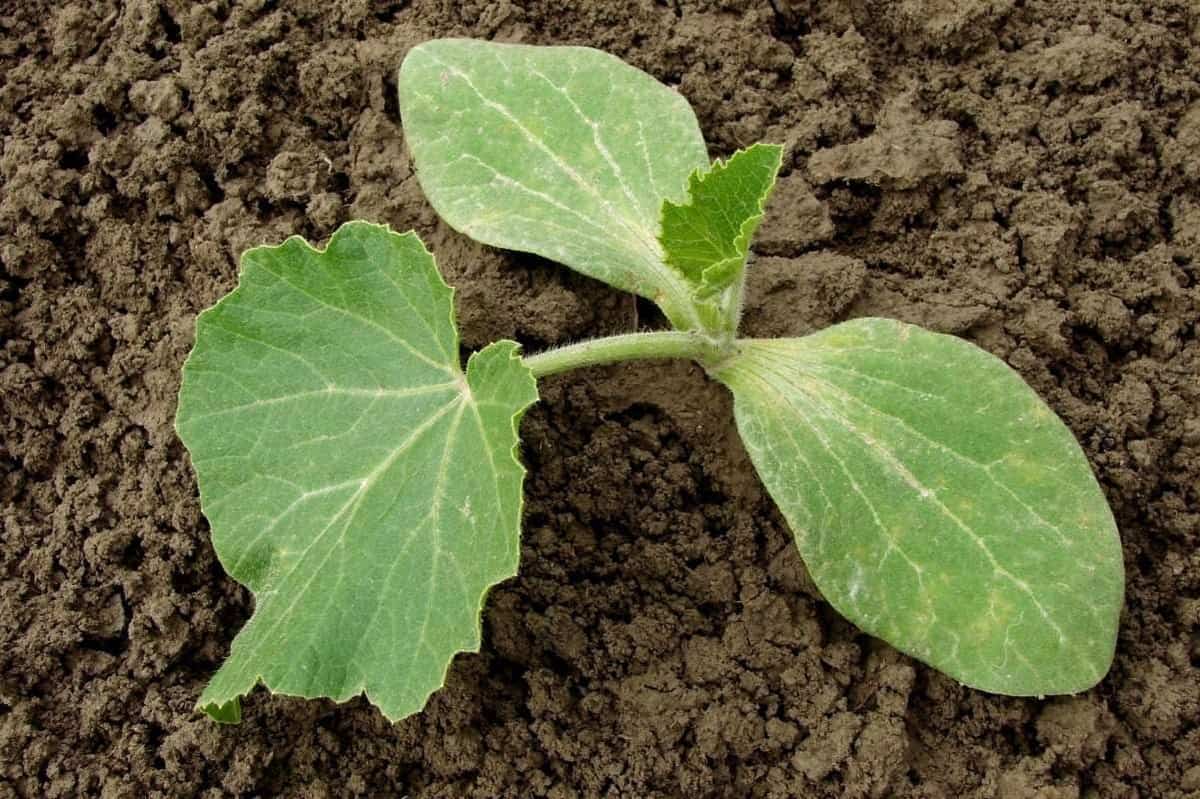
- After the plants have 2-4 sets of true leaves, plant the pumpkin plants out in their final spot in the garden.
How to transplant pumpkin starts outdoors
- Plant your transplants when the soil has warmed to at least 70°F. Even warmer is better!
- Prepare your soil. Make sure you’ve chosen a location that gets at least six hours of sunlight a day and has well-drained soil. Work well-aged manure, compost, or fertilizer into the ground to prepare it for your heavy-feeder pumpkin plants.
- Dig a hole a little wider than the plant you are transplanting. Add a balanced fertilizer or more compost to the bottom of the hole to help jump-start growth.
- Add in the pumpkin seedling—being careful to disturb the roots as little as possible—and then backfill around the seedling. Use your hands to firm around the plant.
- Water the plant well, mulch around it using organic mulch, and keep it warm and watered until it is established.
How to grow pumpkins from direct seeding outdoors
If you have the growing season to support it, direct sowing pumpkins is our preferred method.
Growfully Protip
In our 6B gardens, we’ve done side-by-side tests of direct-sowed pumpkins versus seed-started pumpkins. Direct sowed plants could “catch up” to their counterparts who were started indoors within about a month. This is probably due to the transplant shock the seedlings had to work through.
- Prepare the soil. Pumpkins need full sun and well-draining soil. Work a layer of well-aged manure, compost, or fertilizer into the top of the soil since pumpkins are heavy feeders.
- Warm the soil. When direct sowing pumpkin seeds, it’s a good idea to place a piece of black gardening plastic over the area your pumpkins will be growing, especially if you are in a cooler climate. This will allow the ground beneath to soak up sunlight, warming the earth so your seeds can germinate. You can achieve a similar result by putting a floating row cover over the soil for 10-14 days.
- Plant the seeds. Plant pumpkin seeds when the soil has warmed to at least 70°F. You can either plant in rows or hills. To plant your pumpkins in hills, make a mound of earth roughly a foot high and plant four to five seeds in the middle. Plant the seeds one inch deep. Space hills four to eight feet apart. When planting in rows, plant your seeds one inch deep. Plant seeds 6-12 inches apart. Keep your rows six to ten feet apart.
- Seedlings should pop through in 5-7 days. Thin pumpkin seedlings as soon as they reach two to three inches tall. Thin your seedlings to 2-3 plants per hill or one plant every 18-36 inches (depending on the variety) if growing in rows. When thinning pumpkin seedlings, it’s important to snap the plant off near the base instead of yanking the plant out of the ground. This will allow the delicate root system to remain undisturbed.
Growfully Protip
Planting your seeds in hills will also allow the soil to warm faster, so this is a good option if you want to direct sow in a cooler climate.

Can I plant the seeds from store-bought pumpkins?
Unfortunately, pumpkin seeds harvested from store-bought pumpkins aren’t guaranteed to grow. Much of the produce in the grocery store is irradiated to prevent the growth of the seeds.
If they do grow, you have no way of knowing what type of pumpkin you’ll get. Store-bought pumpkins often experience cross-pollination with other squash, so there’s no telling what your saved seeds may grow! I wouldn’t recommend it unless you don’t care what type of pumpkin you get, and you’re just doing it as an experiment.
Do pumpkins need full sun?
Yes! Growing pumpkins need at least six hours of direct sunlight a day. The more sunlight you have, the more pumpkins you’ll grow, and the larger your pumpkins will be! The pumpkin’s leaves take the sunlight and transform it into food that fuels the growth of new vines and new pumpkins.

What are the best conditions for growing pumpkins?
Pumpkins need fertile and well-drained soil to grow. They don’t like soggy soil, but they need plenty of water throughout the growing season.
Pumpkins prefer temperatures between 65°F and 95°F. They’re very susceptible to frostbite, and when temperatures drop below 50°F, their growth slows. To prevent this, make sure they’re covered by row covers whenever the temperatures start to dip.
Do I need to rotate my pumpkin plants?
If you have the space for it, yes! Most pests and diseases are prevented using crop rotation. Avoid planting pumpkins in the same place you planted pumpkins or any other member of the squash family—melons, cucumbers, winter squash, or summer squash—the year before.
Can I grow pumpkins in containers?
Most pumpkin plants take up a lot of room and need some space to sprawl—they do best when planted in a garden bed.
However, some miniature pumpkin varieties, such as Jack Be Little, are compact enough to grow in containers. We’ve had great luck in the past growing pumpkins and other winter squash in half whiskey barrels.
Can I grow pumpkins on a trellis?
Pumpkin vines sprawl and take up a lot of room. The good news is pumpkins are excellent climbers, so even gardeners with small growing spaces can grow pumpkins! Train the pumpkin vines’ vigorous growth vertically by providing a large trellis. Trellising your pumpkins can also help cut down on disease and pests while keeping the pumpkin clean and up off the ground.
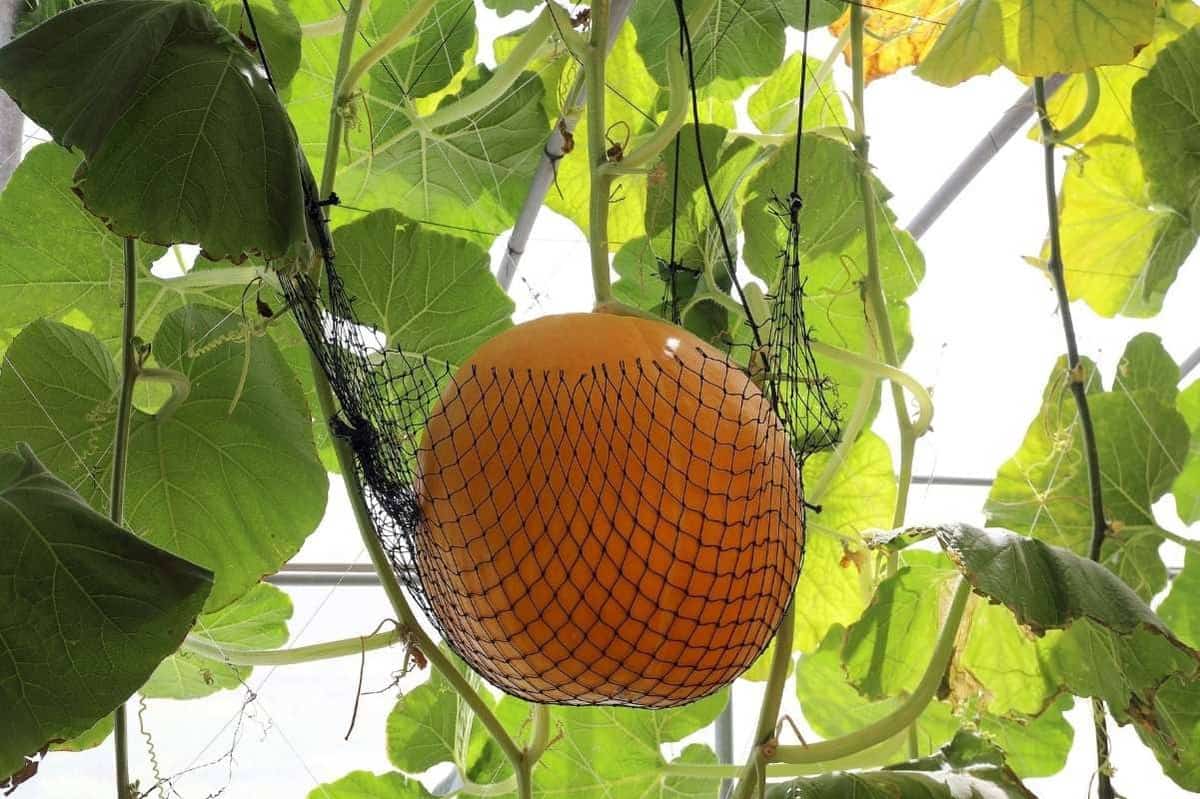 Make sure your trellis is sturdy enough to handle the weight of the vines and the growing fruit. We recommend sticking with smaller pie or ornamental varieties if growing vertically—leave the giant pumpkins to be supported by the ground.
Growfully Protip
If you’re short on gardening space but don’t want to use a trellis, another option is to plant your pumpkins on the garden’s edge and direct their growth outwards onto the lawn. This will give them the room they need without taking over the entire garden.

How do I care for growing pumpkins?
After your pumpkins have germinated, it’s a good idea to cover them with a floating row cover to keep the pests away and help hold in some heat to encourage better growth. It’s important to remove the row covers as soon as blossoms appear because pollinators need access to these blooms.
Weeding pumpkins
Despite their size, pumpkins have fragile, shallow roots, so it is important to avoid disturbing the root system as you weed. Use mulch to cut down on the number of weeds you need to pull. This will also help retain moisture and prevent water evaporation around your pumpkin’s roots. If you need to weed, the best method would be to use a surface hoe like a Collinear hoe.
Watering pumpkins
Pumpkins are very thirsty, and they require a lot of water. Aim to water your plants one inch per week. Avoid getting water on the leaves or watering from above—water that gets caught on the leaves of your pumpkin plant can cause diseases to spread. Instead, water the plants from the base of your plant.
Fertilizing pumpkins
Pumpkins are heavy feeders that benefit from added fertilization. Nitrogen-rich fertilizer is best during the growing season. You can stick with a balanced fertilizer all season long, or you can switch to a phosphorus-rich fertilizer when the pumpkin blossoms bloom to help ensure the fruit is set strongly.
How do I grow a massive pumpkin?
Pumpkins have the potential to grow incredibly large. In fact, some varieties were created specifically for the purpose of growing massive pumpkins. There are a few things you can do if you’re looking to produce a record-breaking pumpkin.
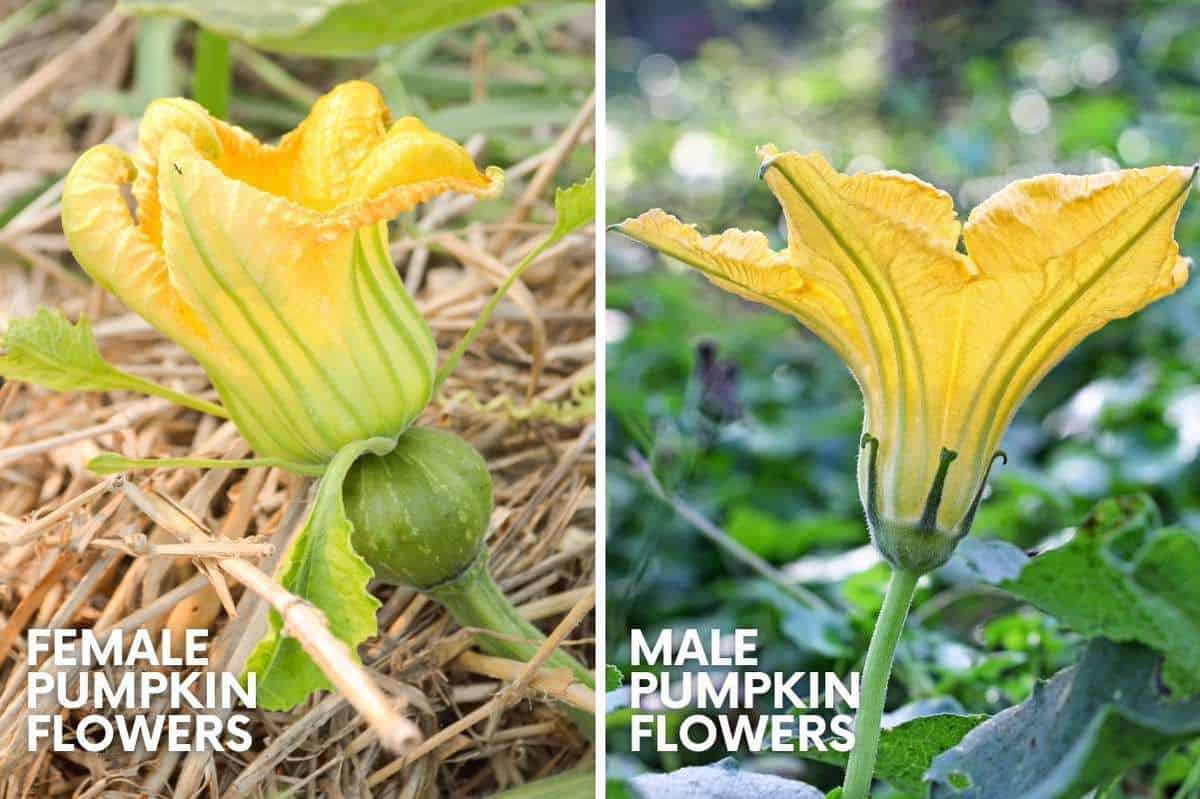
First off, when your vine is still growing, remove the first few female flowers you see. You can tell that they’re female because they’ll have a small ball at the base of the flower. Removing these directs the plant’s energy into growing bigger vines to support larger pumpkins.
Next, pinch off the ends of your vine once you have a few pumpkins started. This will help direct the plant’s energy from growing new vines and send that energy into the development of the fruit.
If your vine has multiple pumpkins growing on it, you can also pinch off most of the smaller ones, leaving one or two pumpkins on the vine. All of the plant’s energy will be directed into growing ginormous pumpkins!
Why are the flowers falling off my pumpkin vines?
Pumpkins produce both male flowers and female flowers. Both are needed for your plant to produce fruit. The first round of blooms is often male, and the second round is female. Male blooms may fall off your plant after the female blossoms appear or have used up all their pollen, and this is perfectly natural. It’s the females that will produce the fruit.
You can tell the difference between the male and female blossoms by looking at their base. Male flowers grow on a slender stem, while female flowers have a slight swelling directly below the flower.
Pumpkin pests and disease
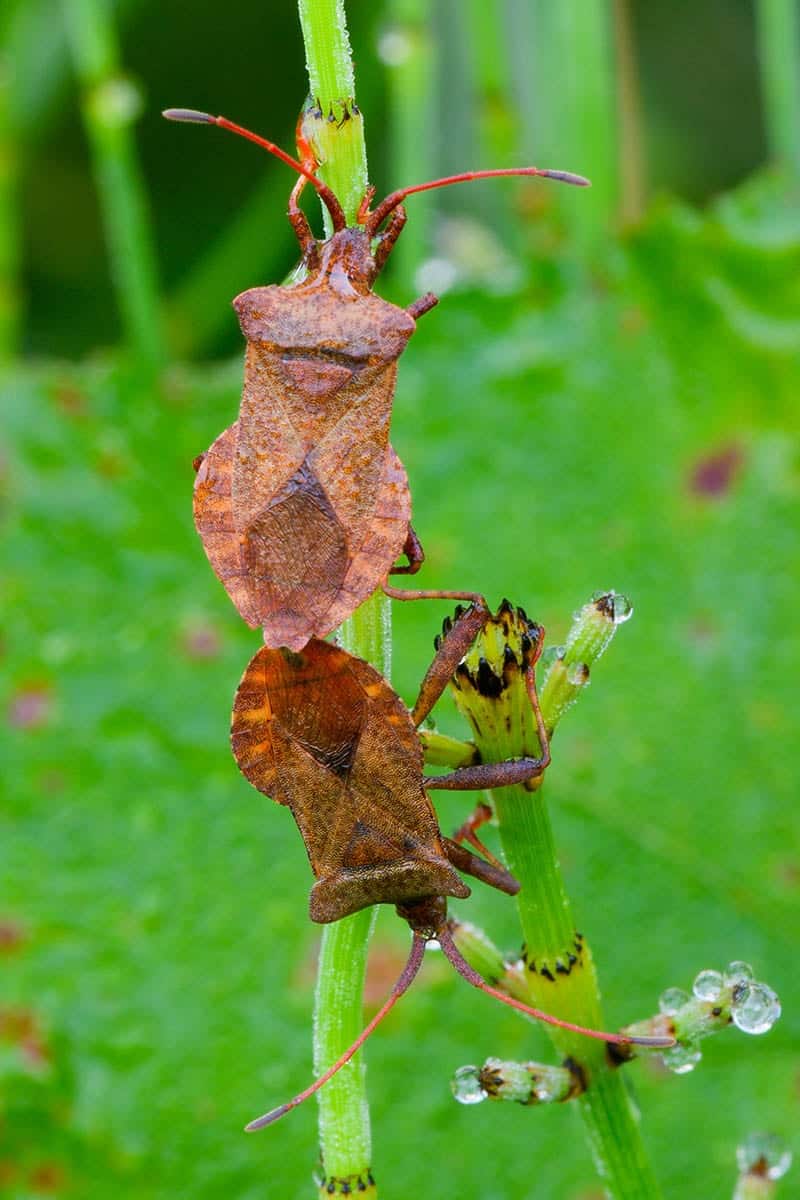
Generally, pumpkins are pretty easy to grow, but they deal with a few pests and diseases that you have to look out for—the most common of which is squash bugs. Let’s talk about how to tackle them.
Growfully Protip
For all these pests and diseases, proper crop rotation will help you with prevention.
Squash Bugs
In the Growfully Gardens, squash bugs are the #1 cause of pumpkin crop failure. Squash bugs are large, flat-backed bugs that feed on the leaves and fruit of young plants. They’re tough to get rid of as adults, so catching them before the eggs hatch is crucial. Look on the underside of leaves for clusters of tiny white eggs. Scrape them off and squish them before they hatch. If you find adult bugs, you can toss them in a bucket of soapy water. Insecticidal treatments aren’t effective on adult bugs. To prevent squash bugs from taking over your garden, remove any old foliage or garden debris that they can hide under.
There are many ways to handle squash bugs, so we have a big squash bug troubleshooting guide that can help you figure out how to deal with them.
Growfully Protip
If you deal with squash bugs regularly, one way to salvage your crop is to bury parts of the horizontal stems under the soil regularly. The plant will root itself in every spot buried, and even if squash bugs destroy one section, it can still survive.
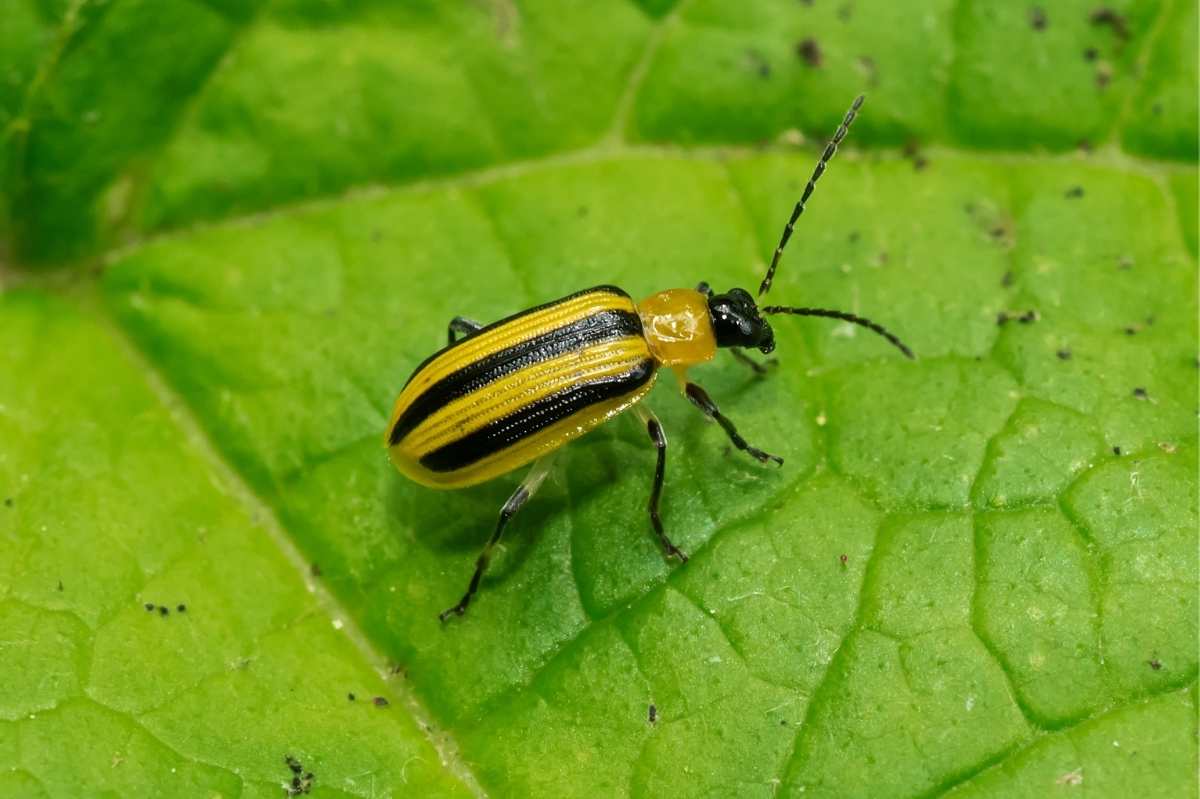
Cucumber Beetles
These striped or spotted beetles feed on the foliage of seedlings and mature plants. The cucumber beetle larvae feed on the underground roots and stems after hatching. A small infestation isn’t much cause for concern, but if the infestation starts to impact the plant’s health, you can use neem oil, kaolin clay, or many other control options that we outline in our guide to dealing with cucumber beetles.
Aphids
Aphids are tiny green, red, black, brown, white, or yellow bugs that feed on your pumpkin plant’s tender leaves, stems, fruit, and blossoms. If you’ve noticed yellow, curling leaves, deformed or distorted fruit, or a sticky substance known as “honeydew” covering your leaves (or the ants that love to feed on the honeydew), you may have aphids.
Soapy water, neem oil, insecticidal soap, Bacillus thuringiensis (BT), or flour dusting can all discourage aphids. If the aphids are only on a portion of the plant, you can also clip off the infested leaves and dispose of them far from your garden. In general, a few aphids aren’t a huge issue on established plants.
Growfully Protip
To protect pollinators such as bees, insecticidal soap should be used only in the early morning or evenings when pollinator activity is low. The residue won’t hurt the bees if they land there later, but it is toxic to pollinators if they are directly sprayed.
Squash Vine Borers
Squash vine borers are the larvae of a particular type of moth. The moths lay their eggs at the base of the plant, and when they hatch into larvae, the squash vine borer burrows its way through the plant’s stem, often killing it. Prevention is the key in dealing with squash vine borer. Since they overwinter in the soil, it’s important to rotate your crops and never plant squash in the same place two years in a row. Proper garden clean-up and tilling of the soil in both the spring and the fall are also vital. Using row covers and wrapping aluminum foil around your plant’s stems can prevent eggs from being laid.
Powdery Mildew
This is a white fungus that spreads over the leaves of your plants. It’s a slow-moving disease and typically isn’t fatal to plants, but it can hinder your plant’s growth and spread quickly in the wind from plant to plant.
To prevent powdery mildew, make sure plants have plenty of space between them to allow for good airflow. If you find leaves affected with powdery mildew, you should remove and destroy them to prevent the spread. A baking soda and water mixture is an effective home treatment for powdery mildew. Mix one tablespoon baking soda and one-half teaspoon liquid soap with one gallon of water, and spray liberally on the plants.
Anthracnose
This fungal disease causes dark, sunken spots to form on your pumpkin’s leaves. These may start as small yellow or brown spots. Warm, moist conditions cause this disease to thrive. To prevent it, water your pumpkins from the ground and don’t allow the fruit to sit directly in the soil.
Growfully Protip
Lay a heavy piece of cardboard or a thin slice of wood underneath your developing pumpkin fruit to cut down on disease. If your vines grow on a trellis, you can support their growth with an old stocking or some netting.
How many pumpkins will I get per plant?
The answer depends on many factors, including the species of pumpkin, the growing conditions, and your climate. Generally, a good size pumpkin vine will support up to five pumpkins. Smaller-sized pie pumpkins and mini pumpkins might produce up to a dozen little pumpkins.
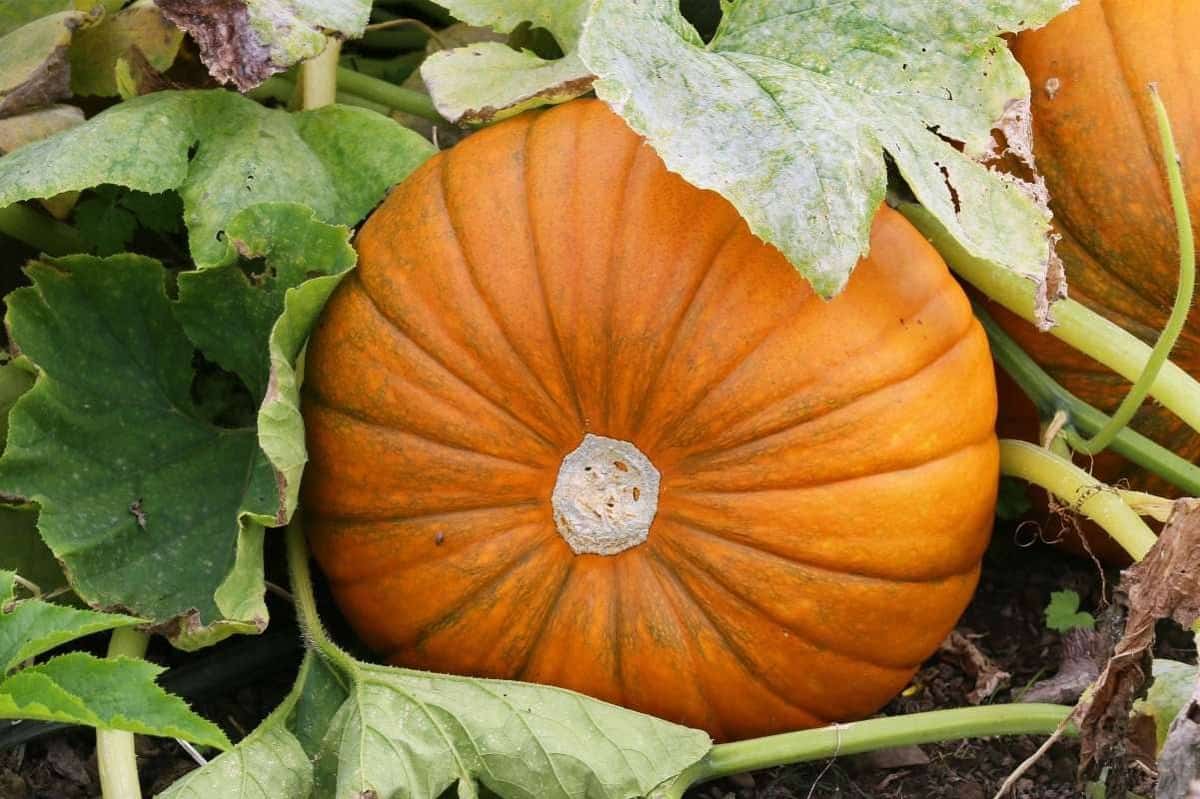
How to harvest pumpkins
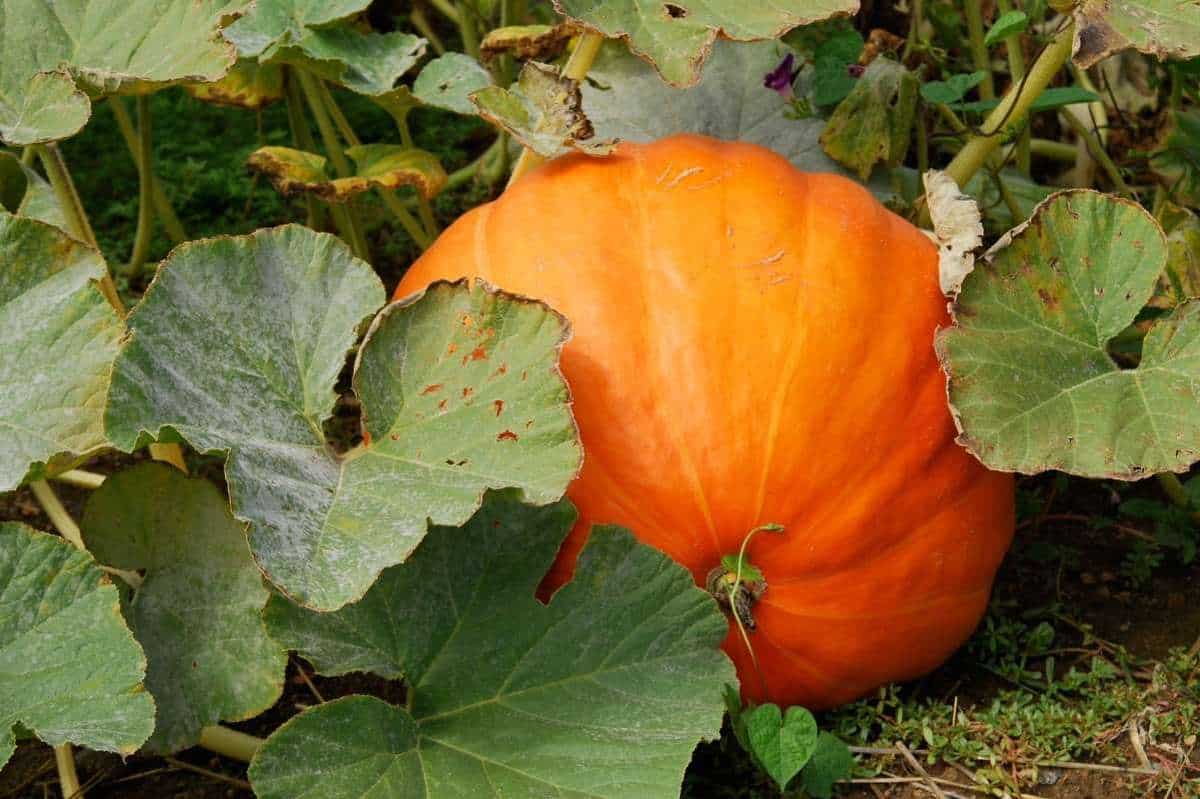
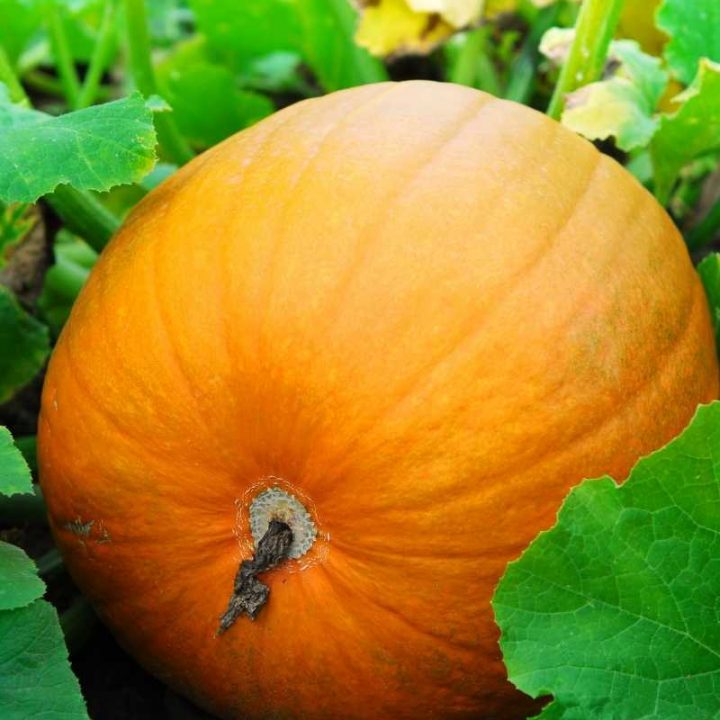
There are a few ways to tell if your pumpkin is ready to be harvested. Most varieties should have developed the even orange hue that pumpkins are famous for. When you scratch gently on the rind, it should be hard. The stem should also have hardened, the leaves closest to the pumpkin should have turned brown and crunchy, and the pumpkin should sound hollow when you tap on it.
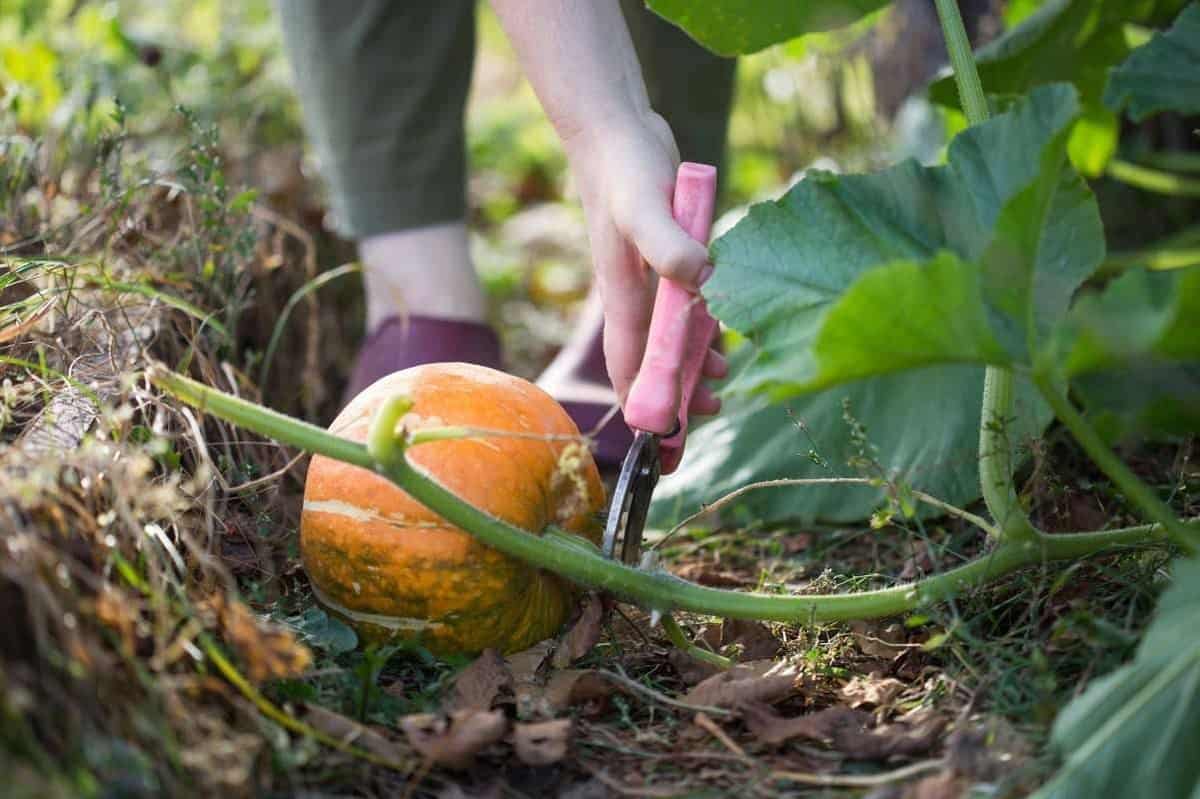
Harvest pumpkins on a sunny, dry day. Slice through the stem at least 3 inches from the fruit using a sharp knife. This large chunk of the stem will keep your pumpkin fresher for longer. Leave your pumpkins out in the sun to cure if the weather remains sunny and dry. If the weather turns or temperatures drop below 55°F, move your pumpkins inside where they can continue to cure. It can take upwards of one to two weeks for your pumpkin to completely cure.
How to store pumpkins
After curing, store pumpkins in a cool, dry room. Root cellars, basements, and spare bedrooms all work well—keep pumpkins at a temperature of roughly 55°F. For best results, store your pumpkins up off the ground—a thin piece of wood works well—to prevent direct contact with the ground.
When properly cured and stored, pumpkins will last at least three months, with some varieties lasting 6-12 months.
How to Grow Pumpkins
Materials
- Pumpkin seeds
- Compost, well-aged manure, or fertilizer
Tools
- Floating row cover
Instructions
- Start early. Pumpkins take a long time to grow, so try to get them in the ground two weeks after your last frost date.
- Warm the soil. Pumpkins will grow best when planted in warm soil. If you live in a cooler climate, stretch black plastic or a floating row cover over the garden bed for a week or two before planting to warm the soil. Remove the plastic and plant as usual.
- Direct sow if possible. Pumpkins don’t love being transplanted, so we recommend direct sowing pumpkin seeds. If you live in a cooler climate with a shorter summer though, you may need to start seeds indoors.
- Use row covers. Cover newly-germinated pumpkin plants with a floating row cover to trap heat and deter pests. Remove as soon as blossoms appear to let in pollinators.
- Water wisely. Pumpkins need lots of water, but avoid soaking the leaves or watering from above, as it can lead to disease. Instead, water from the base of the plant.
- Fertilize well. Pumpkins take up lots of nutrients from the soil and benefit from added fertilization. Amend the soil with compost before planting, and use a nitrogen-rich fertilizer throughout the growing season.
- Practice crop rotation. Crop rotation is the best way to prevent diseases and pest infestations from affecting your pumpkin plants.