Garlic is one of my favorite crops to grow in the garden. It’s truly a set-it-and-forget-it crop—here in our area, you plant in mid-October, and other than harvesting the garlic scapes in late spring (more on that in a sec) you don’t do much of anything until it’s time to pull up your beautiful heads!
Growing your own garlic is rewarding in a way that’s hard to explain—since garlic is so versatile in the kitchen, it’s easy to envision all the wonderful dishes you’re going to make as you harvest your bounty! Let’s get you growing.
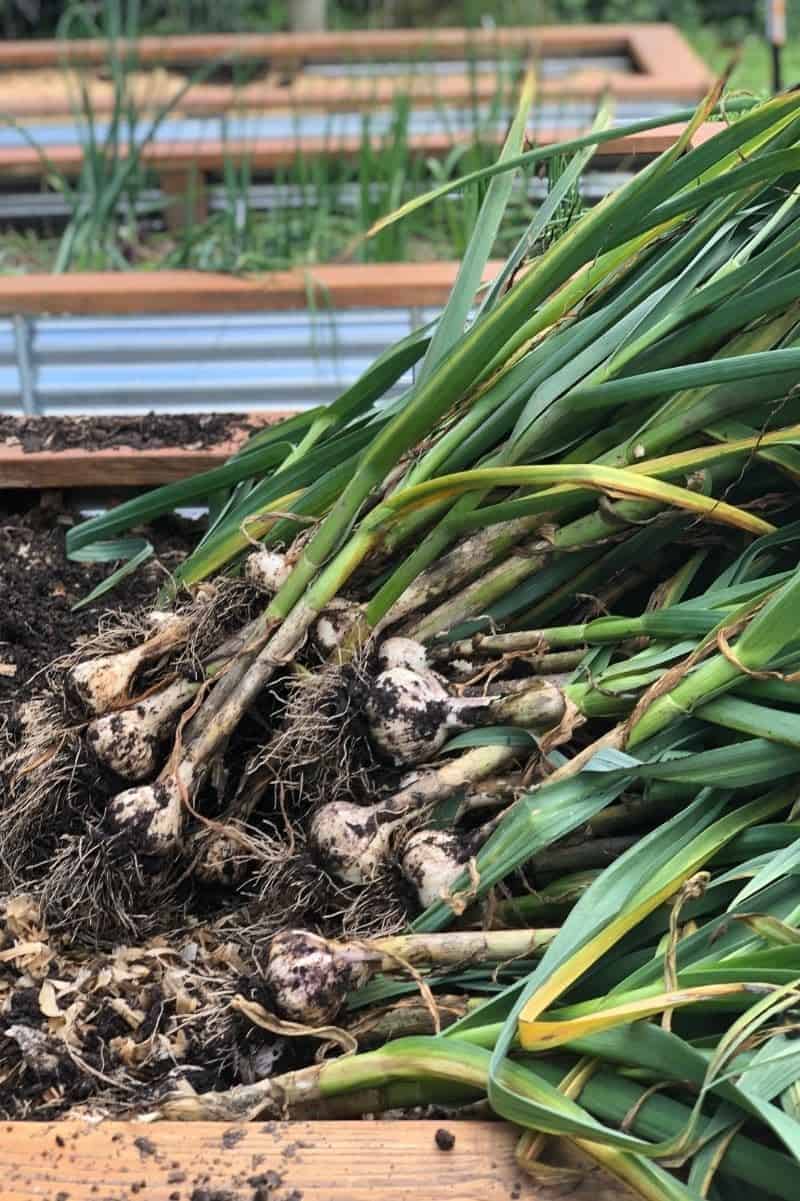
Table of Contents
Choosing what kind of garlic to plant
The first thing you should know—there are two main types of garlic you can grow: softneck and hardneck. Each has its own benefits, so let’s dive into each!
Softneck varieties of garlic have a soft, flexible stem in the middle of the head. The heads of garlic you get from the grocery store are typically softneck. Features of softneck garlic include:
- Tends to have more cloves per head
- Individual cloves are smaller than those of hardneck garlic
- Does best in mild climates or places with less-intense winters
- Generally has the longest storage life
- Cloves can be harder to peel
- Can be braided into beautiful garlic braids
Hardneck varieties of garlic have a stiff stem in the middle of the head. Here’s what you should know about hardneck garlic:
- Tends to have fewer, but larger, cloves
- Is hardier and more cold-tolerant
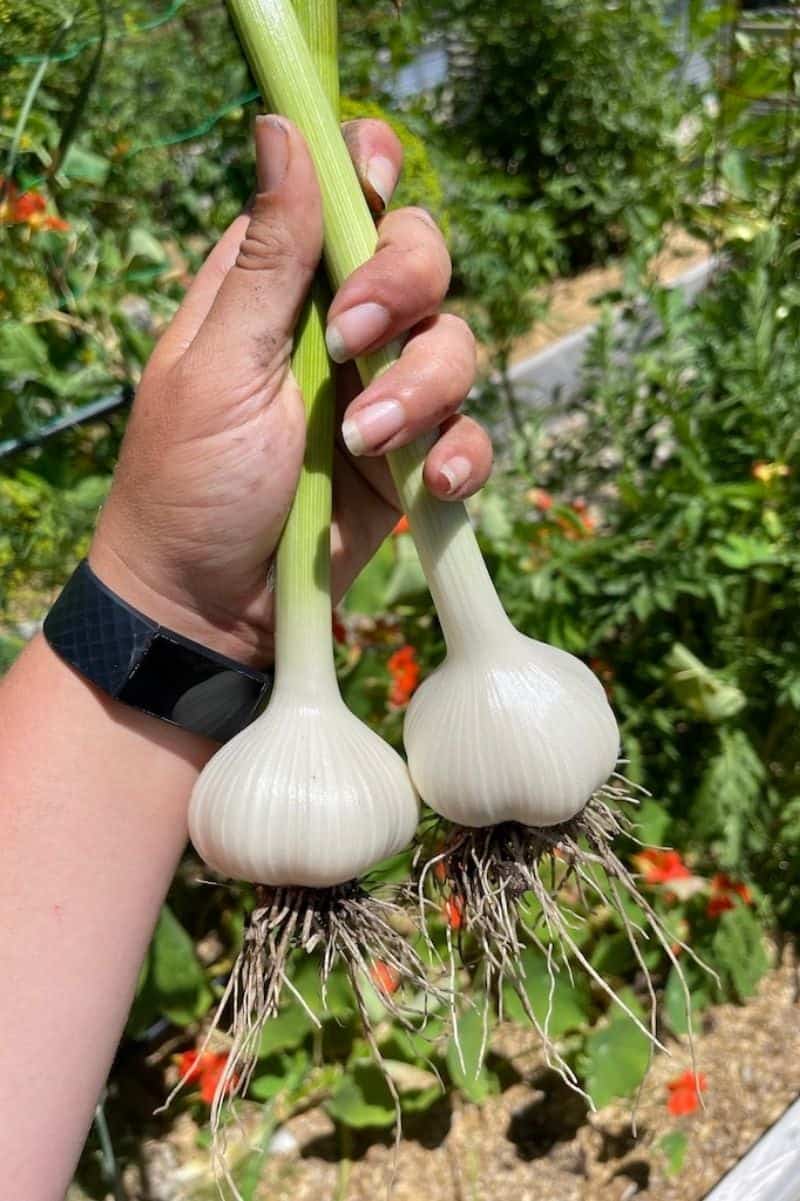
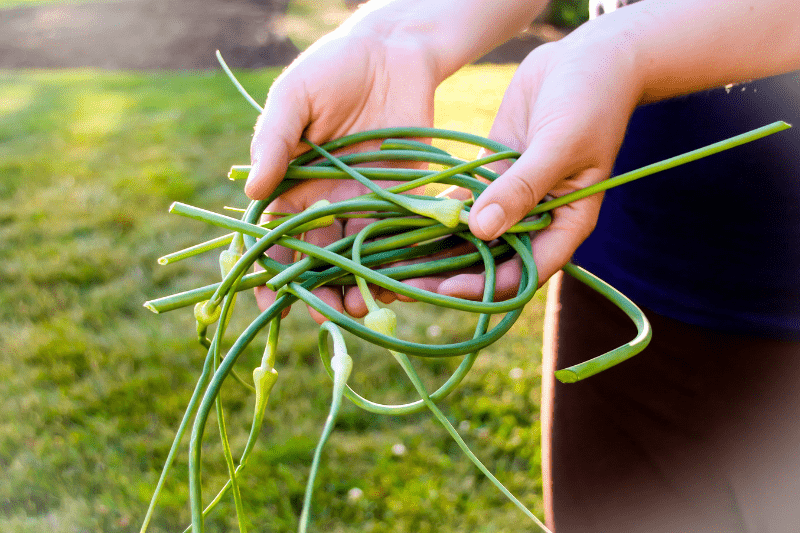
- Produces garlic scapes, which are a delicious one-time-a-year treat
- Cloves are very easy to peel
- Storage time is shorter than softneck varieties
Growfully Protip
Wondering about the giant bulbs of elephant garlic you sometimes see at the store? Well, elephant garlic is technically a leek plant and not a true garlic, but it still tastes similar to true garlic and is a fun option to grow!
We have grown both with good success here in zone 6B, but we absolutely love hardneck garlic in the Growfully Gardens! The easy-to-peel cloves are a joy to cook with, and we love that you really get two crops—garlic scapes in spring and the garlic bulbs in the summer.
What are the best garlic varieties to try?
In general, softneck garlic has a more mild flavor than hardneck garlic, but there are a bunch of variations in both categories! Here are some varieties to try in your garden:
- Music (hardneck): This is the most popular hardneck garlic out there. It’s slightly spicy, incredibly flavorful, and produces 4-6 HUGE cloves per head.
- German Red (hardneck): This is our favorite garlic in the Growfully Gardens! It grows incredibly well for us every year and produces huge, flavorful cloves on a head with beautiful purple stripes. This variety is best if you live in climates with cold winters.
- California Early or Late (softneck): Chances are, the garlic you bought from the grocery store is one of these two varieties. They are easy to grow, mildly flavored, and the best for braiding.
Where can you buy seed garlic bulbs?
In late summer or early fall (depending on where you live), you can typically find garlic for planting in garden stores, hardware stores, or farmers’ markets. They will generally sell varieties that will do well in your garden zone. You can also order it online from places like Peaceful Valley (our favorite place to get seed garlic), Seed Savers, or Baker Creek .

Can you grow garlic from the grocery store?
You sure can! However, there are a few caveats that you should know before you do. First of all, most produce that is imported into the United States from other countries is irradiated to stop them from being able to sprout and produce more fruit. If you try to plant garlic from China (a frequent exporter of garlic), you might not get any sprouts.
However, if you can find garlic from the United States (frequently from California) in the store, you still might not want to plant it for a few reasons. The variety that is successful for professional growers in California might not be a good option for your garden. Also: you have no idea the age of the garlic you are purchasing. It could be as much as a year old and you could have poor results because of it.
Can you plant garlic that you harvested from your own garden?
Yes, and in fact, we highly recommend you reserve your biggest and best bulbs of garlic after harvest each growing season for planting next season! Over the course of a few growing seasons, you’ll eventually have created your own micro-strain of your garlic variety that is genetically best suited for your soil, growing conditions, and micro-climate.
How long does it take to grow garlic?
Garlic is a long-season crop that is planted in the fall and then harvested the next summer. Garlic roots develop through the last months of fall and early winter, and then the bulbs go dormant—they require a period of around 40ºF for at least 30 days to form bulbs the next season. Their growth picks back up vigorously in early spring, with the bulbs being ready to harvest in most areas in early summer.
When do you plant garlic?
Garlic is typically planted September through November, depending on where you live. If you live in a colder climate, you plant your garlic earlier in the fall planting window, and later if you are in a more mild climate. Garlic does need a chill period of 4 to 8 weeks at around 40ºF, so many people in zones above zone 8 struggle to grow garlic with good size bulbs.
Growfully Protip
Some folks have had success growing garlic in Zone 8 and above by chilling the bulbs in the fridge for 4-6 weeks before planting.

How do you prepare the soil for planting garlic?
Garlic plants are heavy feeders, so it’s important to plant garlic in rich soil heavy in compost or other organic matter. We typically put a thick layer (2-3″) of compost on the bed before planting garlic each year.
Like most vegetable plants, garlic prefers a slightly acidic soil pH of between 6.0 and 7.0. Since our gardens have alkaline soil, we always amend our soil with sulfur or a sulfur-based fertilizer (like Espoma Holly-tone before planting garlic.
How do you plant garlic?
Heading out to the fall garden to plant garlic is always an enjoyable experience! It’s a simple process typically done during a beautiful time of year. Here’s how to plant garlic:
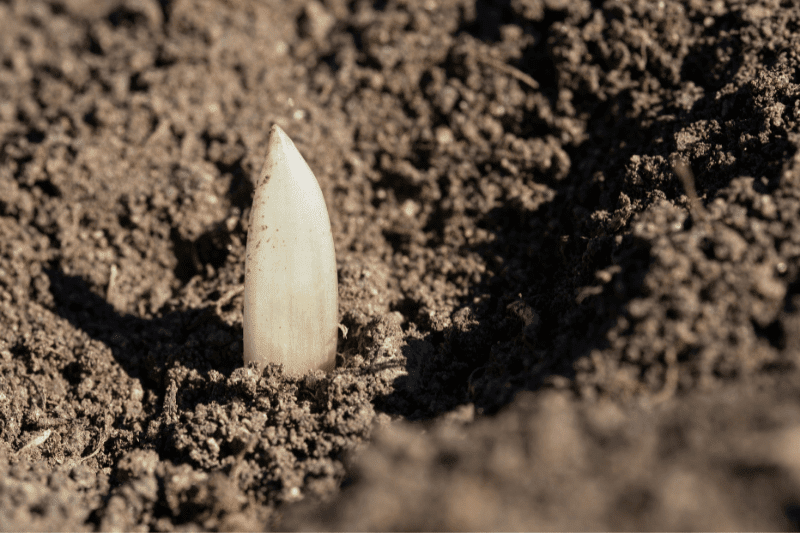
- Separate the cloves from the head of garlic. Discard any cloves that are damaged, rotten, or moldy.
- Press the cloves, pointy side up, into the soil. Plant the cloves about 3-4″ below the surface of the soil. Space the garlic cloves out about 6-8″.
- Cover the cloves well with soil.
- Cover the planted garlic with a thick layer of mulch to protect the garlic through the winter.
Does clove size matter?
In our experience, the size of the clove doesn’t matter much when it comes to the final bulb of garlic—even the small cloves contain the genetic material to produce more good-sized garlic. We’ve planted the smallest clove on a head and gotten a big, beautiful garlic plant and bulb later.
However, the size of the original head DOES matter. In general, cloves from a large head of garlic (even the smallest clove on the large head) will make more large heads. Cloves from small heads will make more small heads.
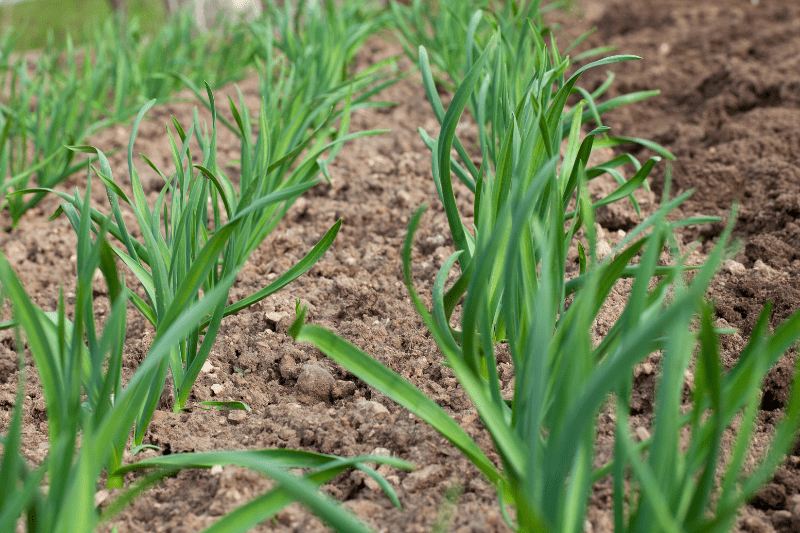
How do you care for garlic plants?
Garlic plants are so low maintenance, you’ll be amazed. Just give them a thick layer of mulch after planting to protect the plants from winter weather. We like to use pine shavings as mulch on our garlic, and we do a layer between 4-6″ thick. You can go thicker if you live in a cold climate or thinner if you live in a mild climate.
Once springtime has come and your plants have started to grow, you might have good results from applying an organic fertilizer on a regular schedule. We apply a mixture of fish emulsion and seaweed to our garlic plants every other week through the spring and summer.
Growfully Protip
In mid-spring, you’ll see hardneck garlic varieties start to produce garlic scapes—these are long, curly, green shoots that eventually turn into the flower stalk and seed pods. You’ll want to cut these off so the plant puts its energy into bulb production, but don’t throw them out! These garlic scapes are a wonderful delicacy that are great for cooking. We love putting them in biscuits.
What should I grow garlic with?
We recommend your main crop of garlic be planted on its own—garlic is a very heavy feeder, and any other crops tend to compete for soil nutrients. We’re big fans of interplanting in the garden, but to get the biggest and best heads, we’ve had the best luck with planting garlic alone.
That being said, because of its strong scent, garlic makes an excellent companion plant to repel insects from other crops! We always stick a few cloves (typically from smaller heads that won’t make great size bulbs in the end) in beds throughout the garden to help keep the pest pressure down.
Managing pests and disease in garlic
When we say garlic is low-maintenance, we mean it! Because of the strong scent, garlic does an excellent job of repelling most pests. There are some pests that don’t seem to mind garlic’s sulfur smell—bulb mites, leafminers, onion thrips, and a few other pests—but the majority of those can be avoided with a good crop rotation plan.
Garlic also has very few issues with diseases (garlic itself in a natural antimicrobial—so fungi, viruses, and bacteria have a hard time taking hold). The one exception here is the rare White Rot fungus. The disease is caused by the fungus Stromatinia cepivora, and unfortunately, it is impossible to control once an area is infested. The most common way White Rot is spread is through infected seed garlic—so make sure you’re getting your seed garlic from a reputable source.
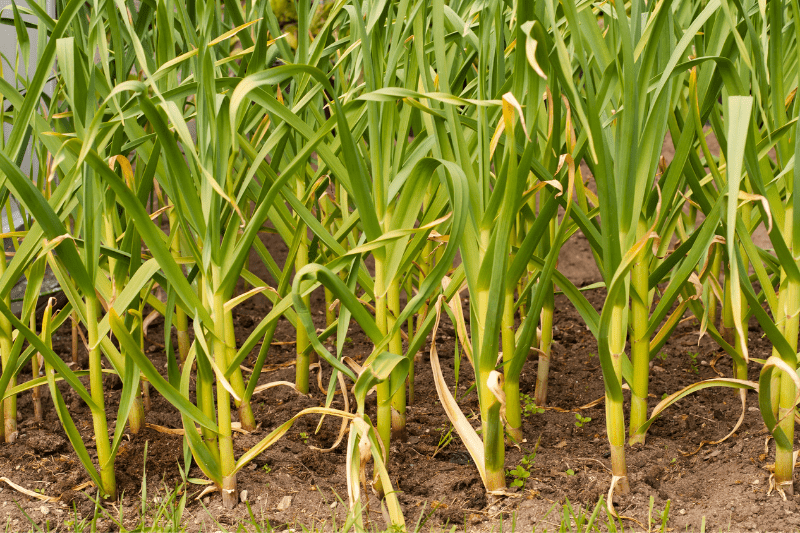
When do you harvest garlic?
Your garlic plants will tell you when they are ready to harvest! You’ll want to harvest your garlic when the lower leaves on the plant have turned brown and died back. You’re looking for about half the leaves on the plant to have turned brown for a good harvest.
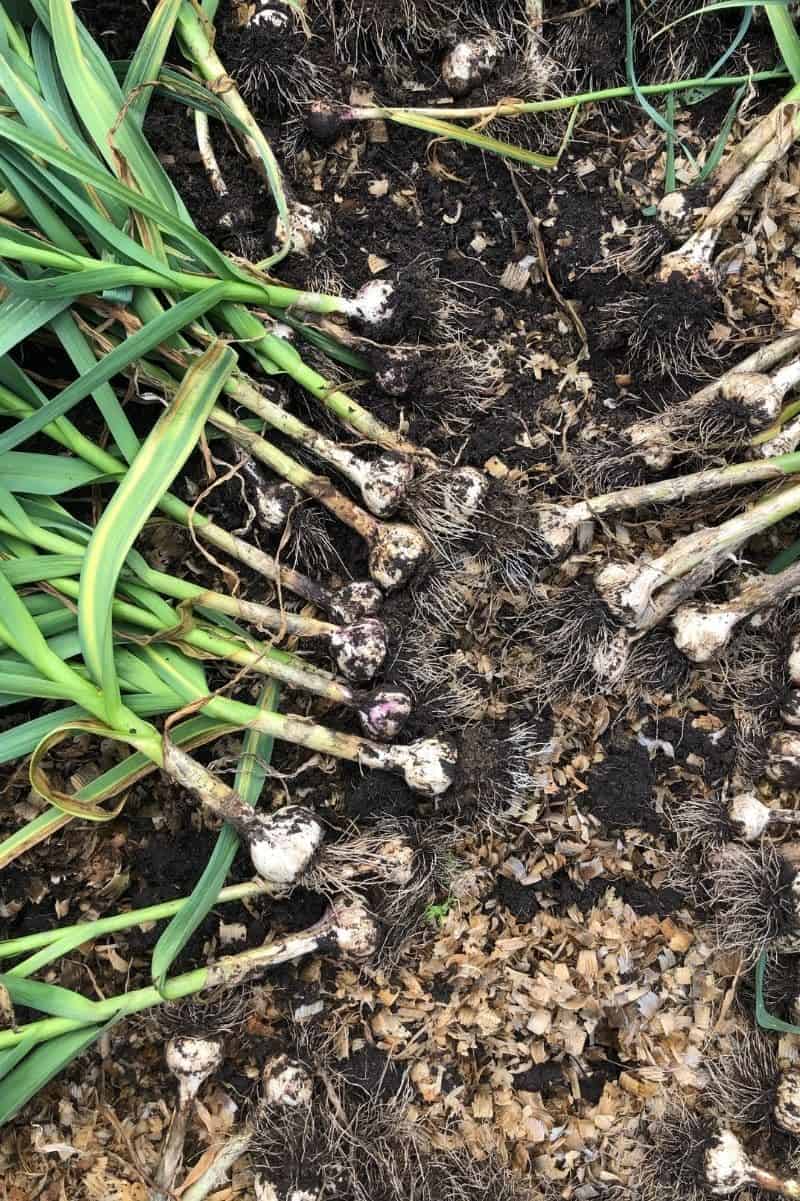
How do you harvest garlic?
Stop watering your garlic about a week before harvest (and honestly, once established, garlic rarely needs watering). You’ll want to harvest on a warm, dry, sunny day—preferably when the soil is nice and dry.
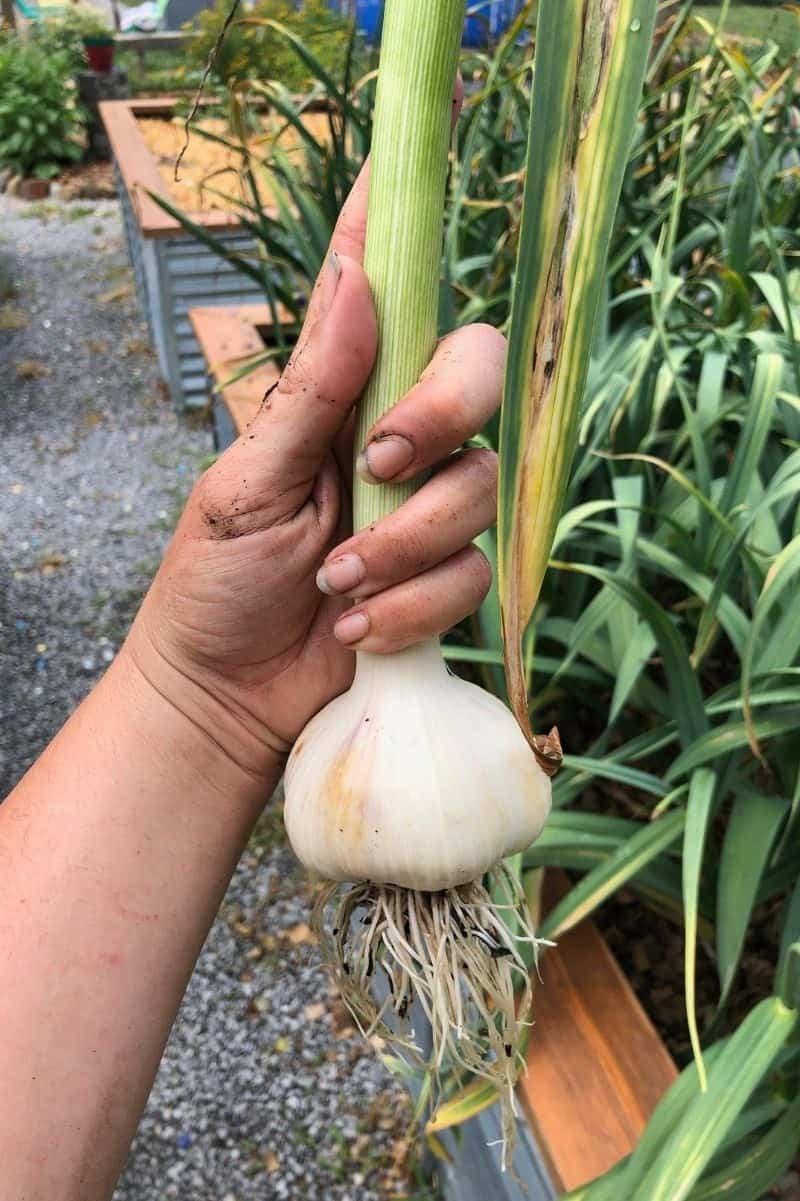
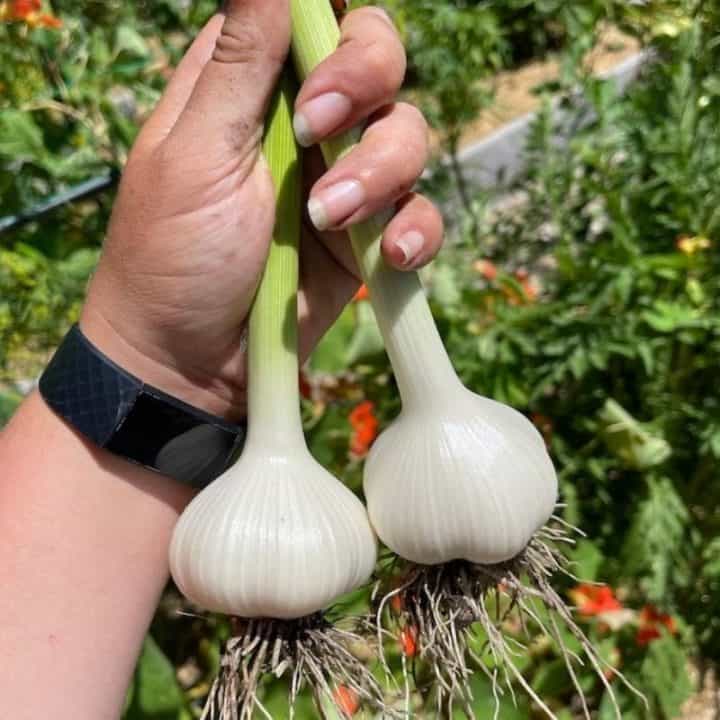
Instead of yanking the garlic out by its neck (which can damage the bulb and shorten its storage life), gently loosen the soil around the garlic bulb, and then twist the bulb until it separates from the soil. Dust off any major clumps of soil, but do not wash! Your goal in the curing step is to reduce as much moisture as possible, so don’t add more by washing the bulbs with water.
Growfully Protip
The easiest way to clean up garlic is to peel back the outside layers of the garlic leaves and discard them. This strips away all of the soil and leaves a beautifully pristine garlic bulb.

How do you cure and store garlic?
You can use your garlic at any point after harvest, but if you want to store the garlic for long term, you’ll first want to cure your heads of garlic.
Immediately after harvest, let the bulbs sit outside under the hot sun for a full day. We just pull up the plants and place them right in our raised beds for a day.
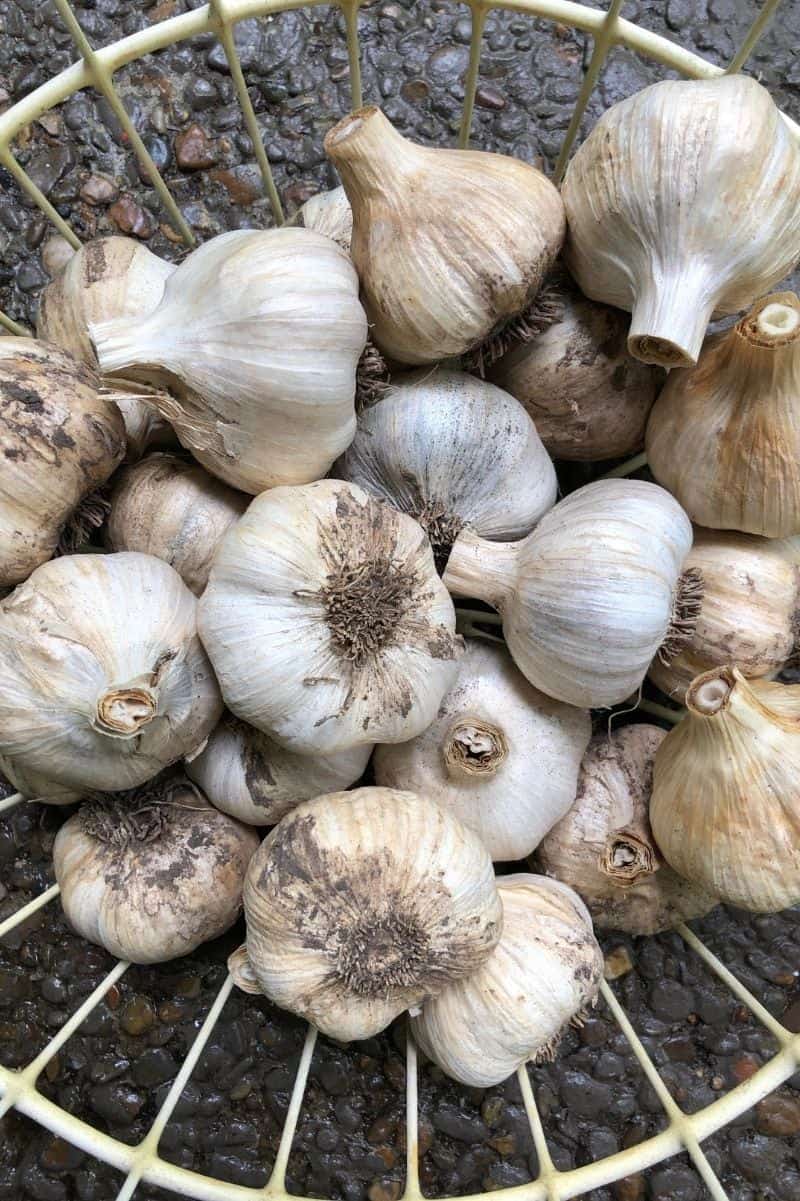
Once the day is over, move the bulbs to a dry, covered location outside that preferably has good airflow. Spread the bulbs into a single layer and let cure until the outside peel is papery, and the neck of the garlic is dry and brittle. This timing will depend a lot on the temperature, breeze, and humidity in your area. In our high-humidity region, it typically takes about a month to cure our garlic.

Once the garlic is cured, snip off the plant at the neck, trim the roots, and store the garlic in a cool, dark, somewhat humid environment. Softneck garlic can store for as much as an entire year in good conditions. Hardneck garlic will need to be used within 3-6 months.
Quick Guide to Growing Garlic
Garlic adds flavor and pungency to vegetable and grain dishes. Here's how to plant, grow, and harvest garlic under organic conditions.
Materials
- Seed garlic bulbs
Tools
- Rich soil heavy in compost or other organic matter
Instructions
- Give them nutrients. Garlic plants are heavy feeders, so amend the soil with a thick layer of compost before planting cloves. Apply fertilizer in the spring.
- Let it chill. Garlic needs 4-8 weeks of 40°F temperatures to form bulbs, which is why we recommend planting in the fall or early winter for an early summer harvest in most climates.
- Mulch it. Garlic needs some cool temperatures, but the plants won't be happy if they get too cold. Cover the plants with a thick layer of mulch, such as pine shavings, before winter hits.
- Get those scapes! Hardneck garlic varieties will grow long, curly green shoots called scapes in the spring. Cut them off so that the plant puts its energy into developing the garlic bulb, and enjoy cooking with the scapes.
- Twist to harvest. To avoid damaging the bulb, twist the bulb until it separates from the soil, rather than pulling the garlic straight out of the soil.
- Cure it. For long term storage of garlic, the bulbs will need to be cured. Allow them to sit in the hot sun for a full day, then move to a dry, covered location with good airflow. Allow to cure until the neck is brittle and the outside peel is papery.