Planning your garden layout is one of the most fun and exciting parts of getting your garden up and running! A good quality garden plan will help you maximize your growing space and make all parts of the gardening process easier.
There are numerous tools you can use to make your plan, but the basic process is the same. We’re going to cover exactly how to plan the beautiful future garden of your dreams!
Table of Contents
What Tools to Use to Plan a Garden Layout
What tool you use to create your garden layout will depend a lot on what you feel comfortable using. Some options:
- Pencil and graphic paper—the classic!
- An online vegetable garden planner like this one from GrowVeg.
- Design software like Adobe Illustrator or Canva.
- Spreadsheet software like Microsoft Excel or Google Sheets—use only if you want straight lines though. There’s no organic curves in a spreadsheet!
- Professional landscape design software like iScape or PRO Landscape.
Most folks are going to choose pencil and paper—it’s classic for a reason! You can also do a combination of the different methods. I personally have made my garden outlines (Steps 1 and 2 below) in Canva, and then I print those out each garden season and use pencils to fill in.
Step 1) Measure and measure again!
Accurate measurements are a vital part of your garden plan—without them, you’re not planning, you’re just guessing. Measure the entire growing space, making sure to take note of the distance around any obstacles you should be aware of (like a fence post, a water spigot, or a kid’s play structure).
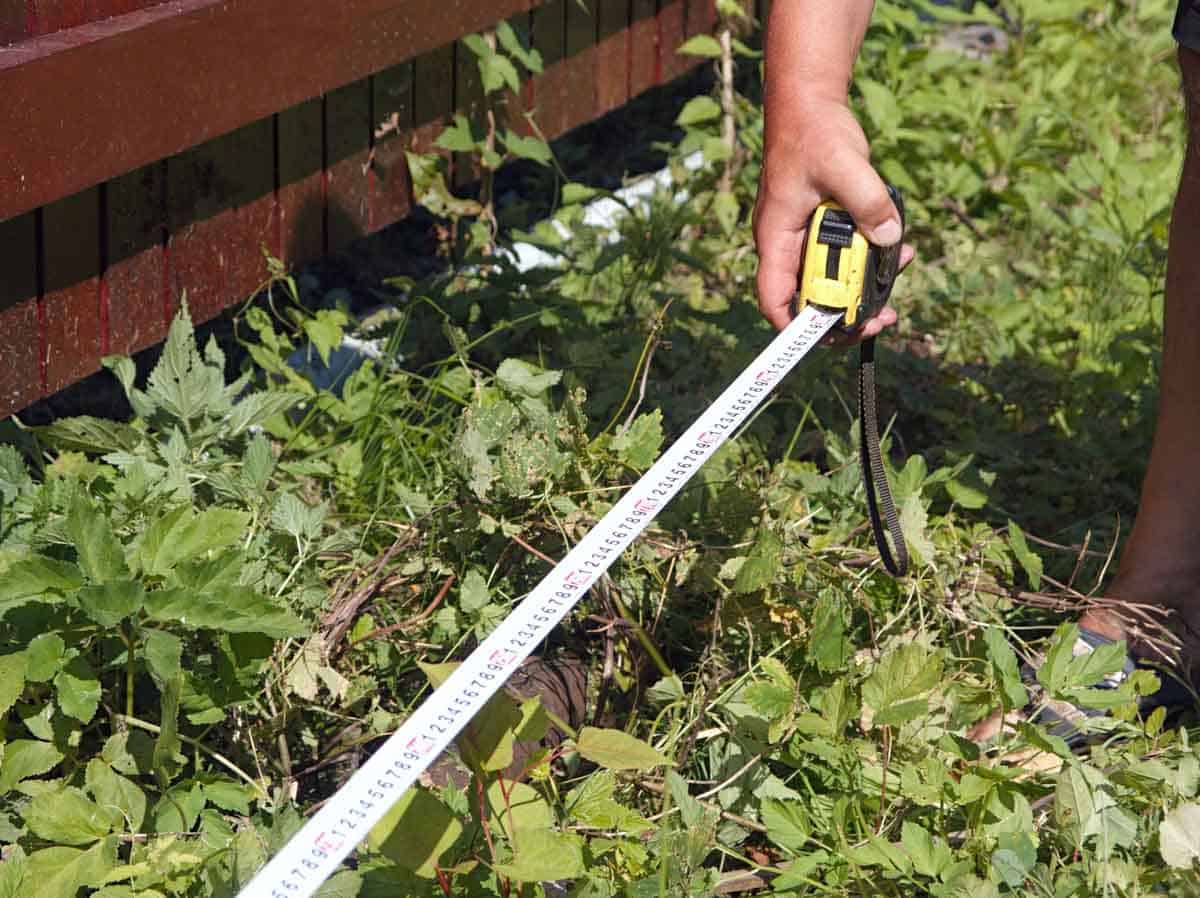
It doesn’t hurt to measure more than once to make sure your measurements are accurate—trust me on this one! The one problem we have with our garden is that our aisles are a touch too narrow—and we could have avoided that problem if we had accurately measured the first time!
Once you have your measurements down, take them back to your tool of choice and draw out the entire outer perimeter of your garden to scale. Make sure to add in obstacles you noted!
Step 2) Start planning your beds.
Now that you have your garden perimeter mapped out, it’s time to start playing around with different bed shapes, sizes, and orientations. Move beds around, change orientations, and change sizes to see what makes the most out of your garden space.
When you’re planning your growing space, here are some important things to keep in mind:
- Garden paths: Think about what kinds of tools and machinery you’ll need to get through your garden paths and make them wide enough. I personally wouldn’t have less than three feet between beds or rows.
- Use your imagination: If you are growing in the ground, you aren’t restricted to rectangles or squares! You can make triangle beds, circular beds, or even just organic shapes that flow with the land.
- Think about the varieties you’re going to grow: If you’ve planned all tall beds, but you want to grow corn, how are you going to reach your harvest?
- Start small, but have a plan for expansion: I recommend starting small, but having a general idea of how you’ll expand in the future if you end up falling in love with gardening (like I’m sure you will). Whatever you think you can handle in your first year, I recommend cutting that amount of planting space in half and only starting there.
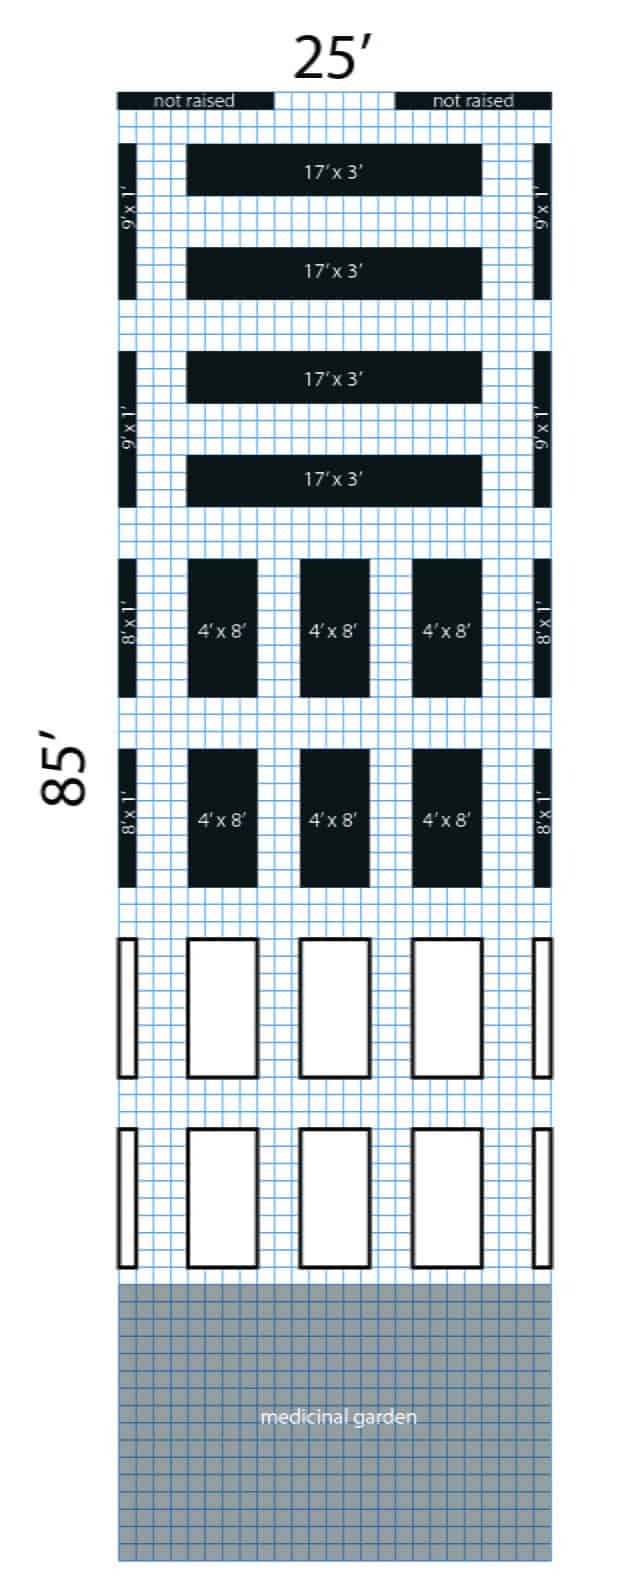
Once you’ve landed on a layout you like, SAVE IT! If you are doing this analog style, I highly recommend snapping a photo of your page with your phone or scanning it into your computer for safekeeping and so you can use it as long as you have this garden layout.
Step 3) Plan What Goes In Your Garden
Now it’s time to put the last piece of the puzzle together—the actual plants that go in your garden! You can just make a copy of your bird’s eye view and then jot down what you want in each bed—and then figure out the exact placement when it’s time to plant.
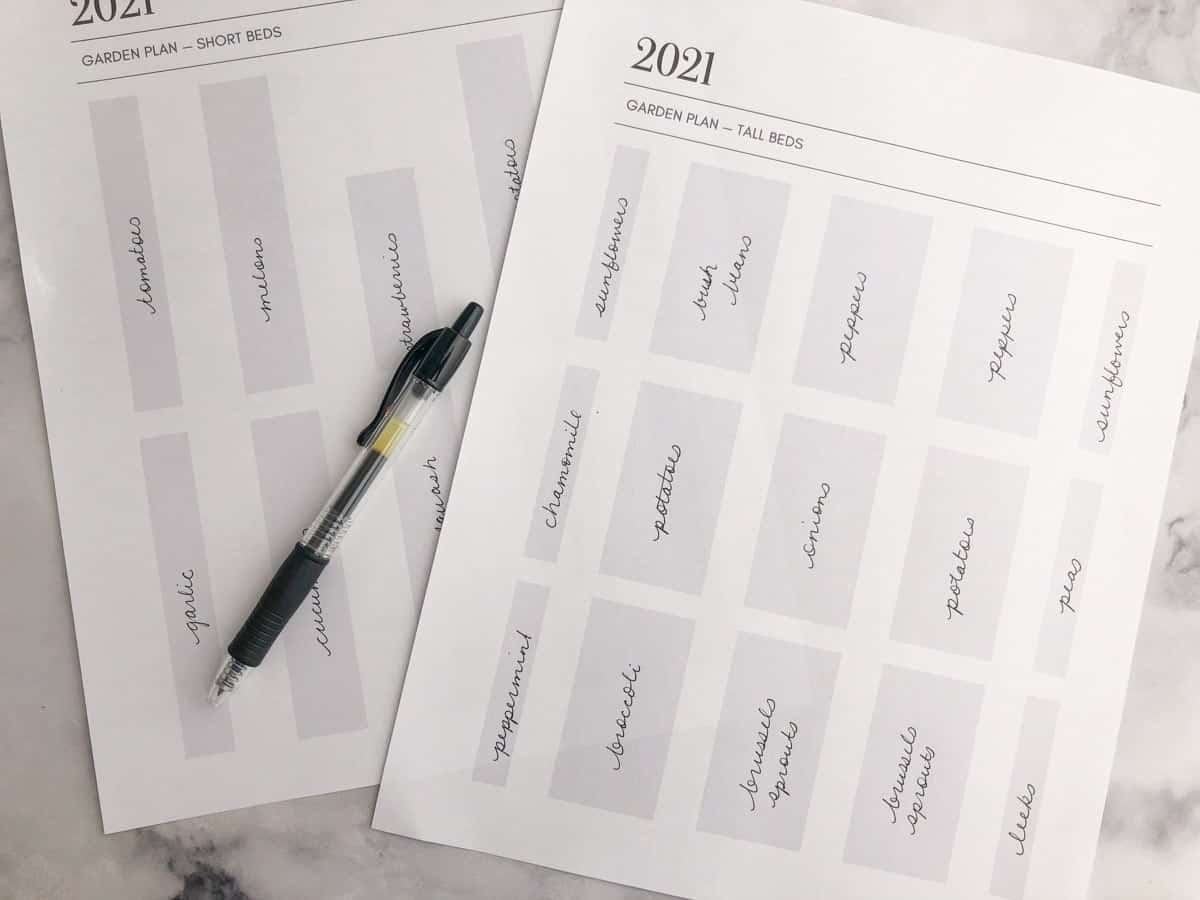
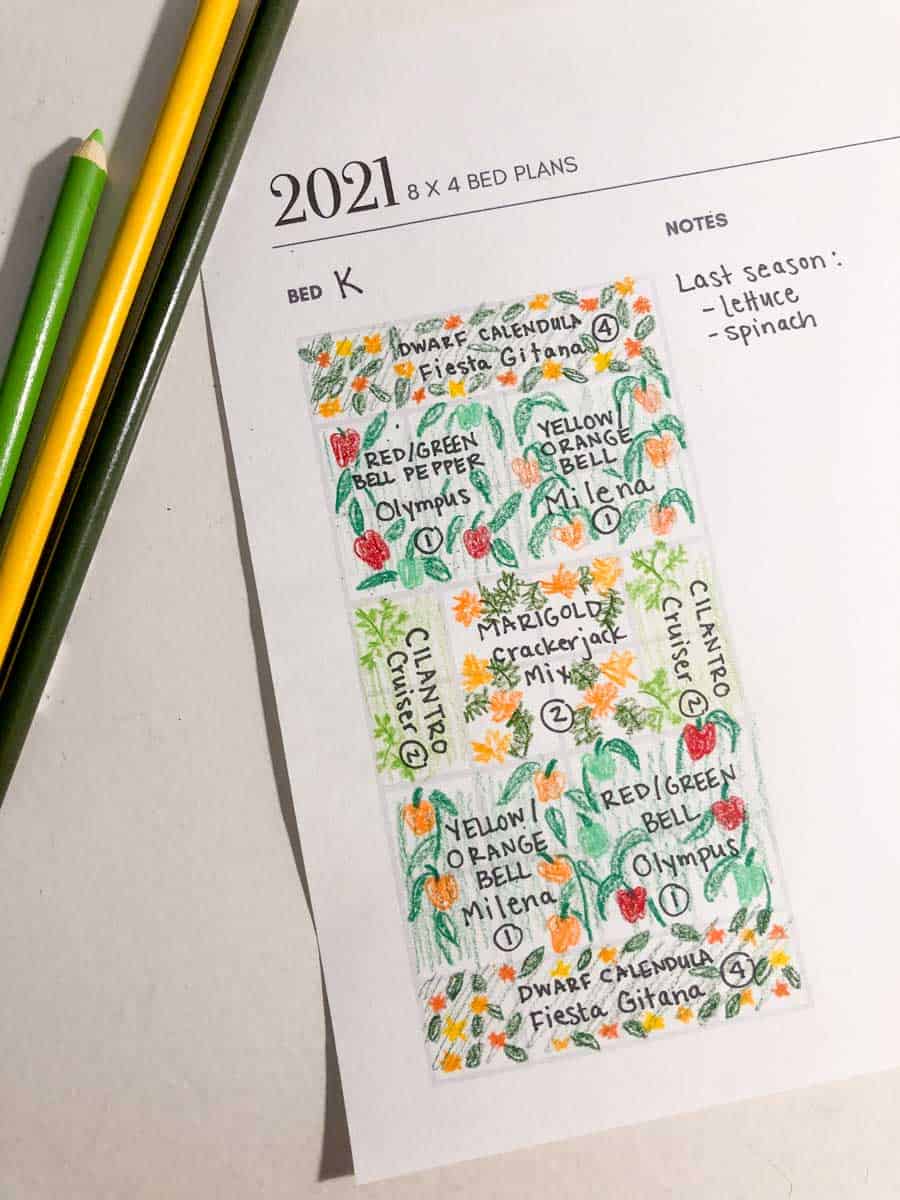
I personally make zoomed-in, inset layouts of each bed so I can actually plan what plants (down to the exact cultivar) go where in each bed. This is important to me because we do a lot of companion planting, so it’s helpful to have a visual guide of what plants go together. It also means I know exactly how many of each variety I need to start! This is an extra step that I don’t think is necessary, but it works for us.
Step 4) Use Your Plan (But Be Flexible!)
Once you are happy with your plan, save it and print it (if working digitally) or scan it (if working analog) and then get ready to refer to it at least 100 times during the growing season! I keep a copy of my garden plan in my garden journal and a laminated copy in my garden tool basket so it’s always with me in the garden.
Of course, it’s important to remember that a garden plan is just that—a plan! It’s not set in stone that you have to follow it exactly, and the truth is, you probably won’t. Some crops will fail, some crops will do better than you expected, and sometimes you’ll just want to switch it up. Don’t be so tied to your plan that you abandon the beautiful, organic, natural process of gardening!
Hi Cassie,
Do you have any plans or recommendations for a hoop house or green house for your Raised beds, I saw one in the background of one of your photos. We get really windy in my area (North Texas) and I am struggling to know what to do.
Thanks!
We use these tents, and they fit right on top of the beds. https://www.etsy.com/listing/883303534/amanita-jewelry-dish-woodland-mushroom
Some people are not aware of how and why a good garden is essential when selling a house. This can prove to be a great help for such individuals, and I was amazed to see people’s reactions when they got to know about this.